How to create and update test stores
Create your Test Store in the Portal
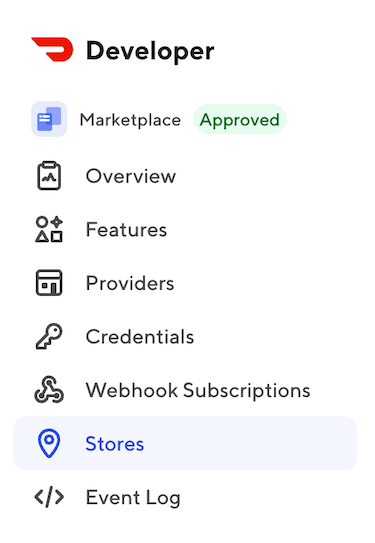
Navigate to the Developer Portal and under the Marketplace tab, Click ‘ Stores ’
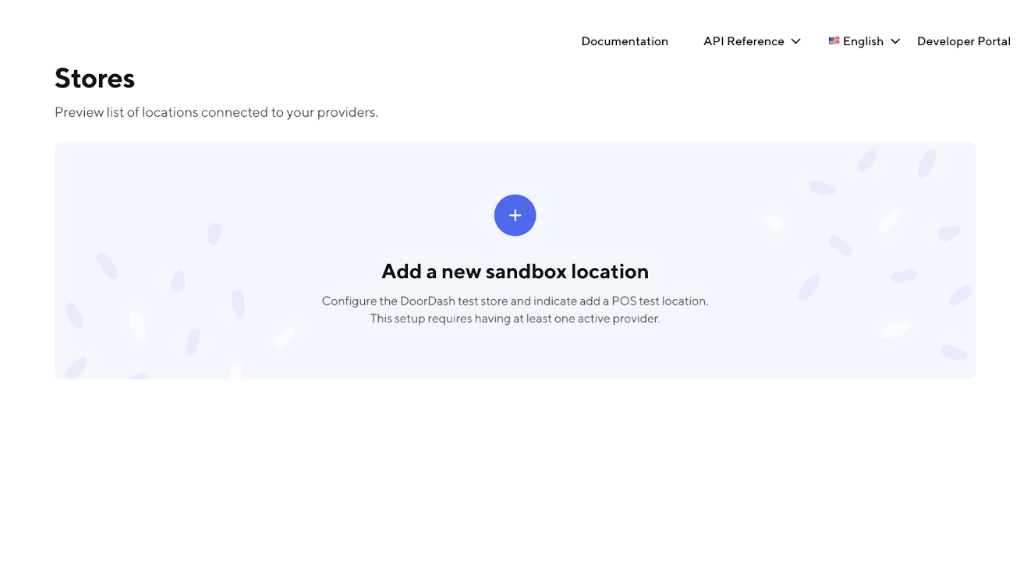
To add a new store:
- Click Add test store
- Click the (+) symbol to add a new sandbox location.
- If a test store already exists in the developer portal and you would like to create an additional test store, Click 'Add Store'.

- The Add a new location dialog box appears
- Enter a Location ID for the store
- Select the Provider type from the dropdown
- You can set up a test store for either Sandbox or your Production provider type
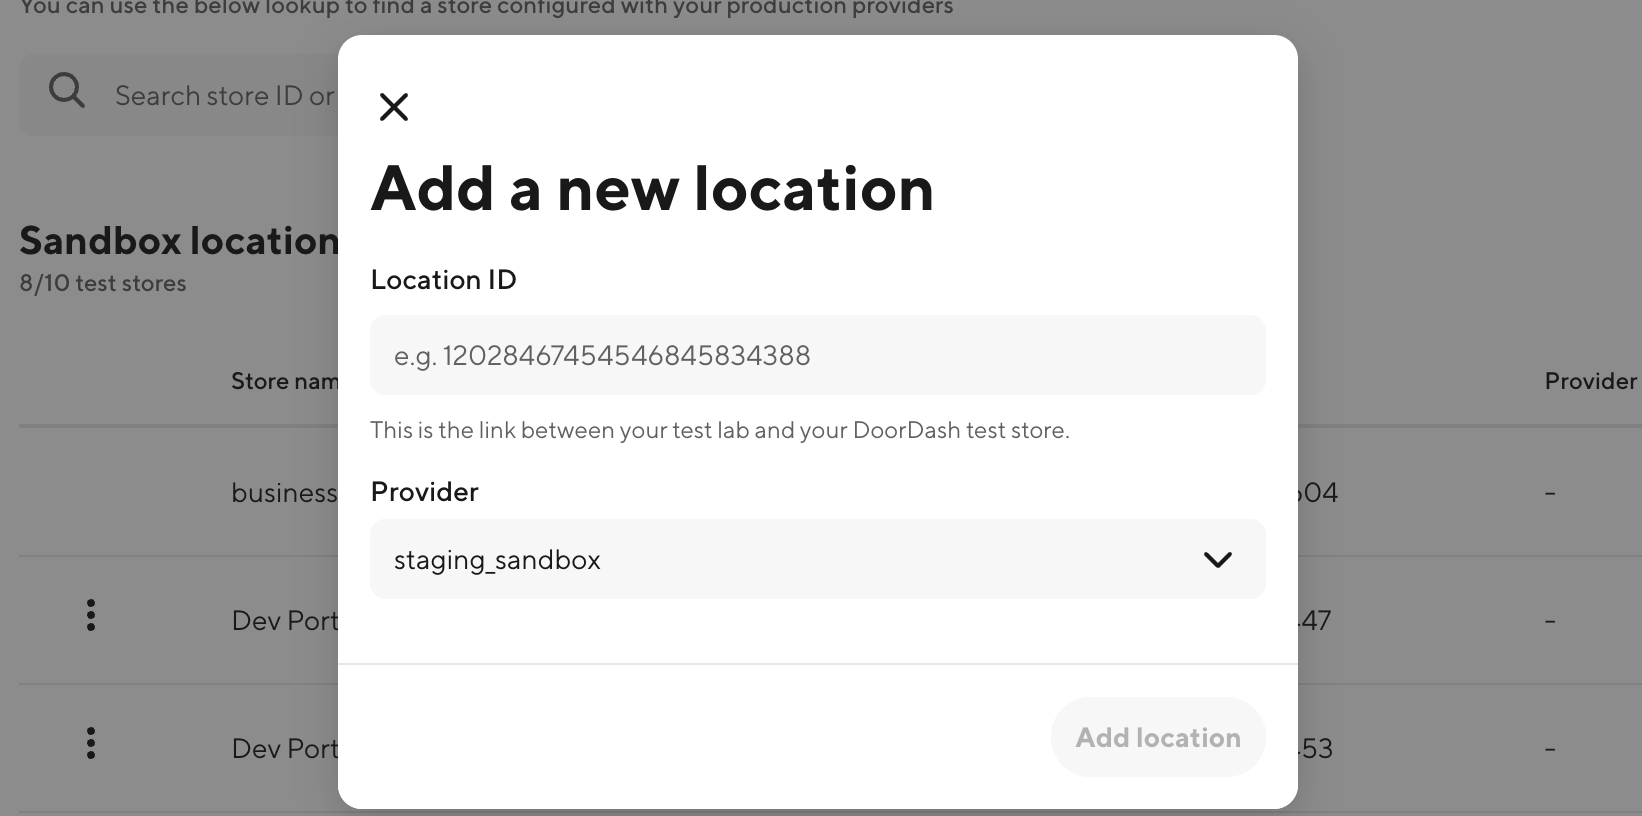
- Click Add Location. The store is added.
Notes:
- You can create up to 20 Test Stores in the Developer Portal.
Update your Test Store in the Portal
- Partners can update their test store's address to any valid location. This is useful for testing delivery logistics in different areas or matching your actual business location.
- Partners can self-activate their test stores immediately after successfully pushing or pulling their initial menu.
Update test store address
Step 1: Navigate to Stores within Developer Portal
Login to the DoorDash Developer Portal and navigate to the stores page in the Marketplace dropdown menu to view your test and/or production stores.
Step 2: Access Store Edit Options
For each store, there is an option to edit the store details after selecting the three dots next to the store.
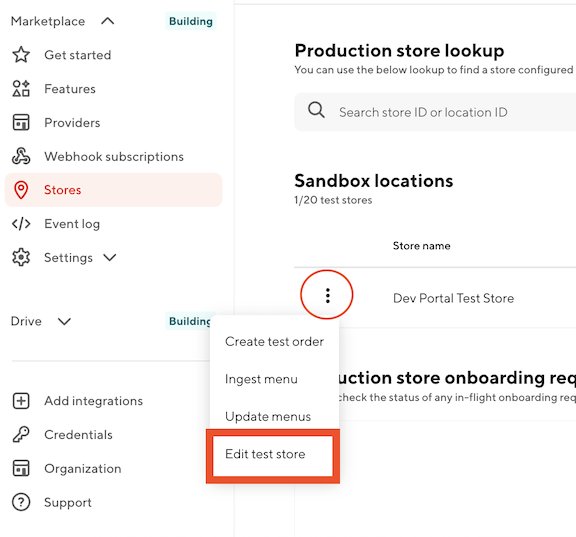
Step 3: Select Edit Test Store
After clicking the three dots, select Edit test store from the menu options.
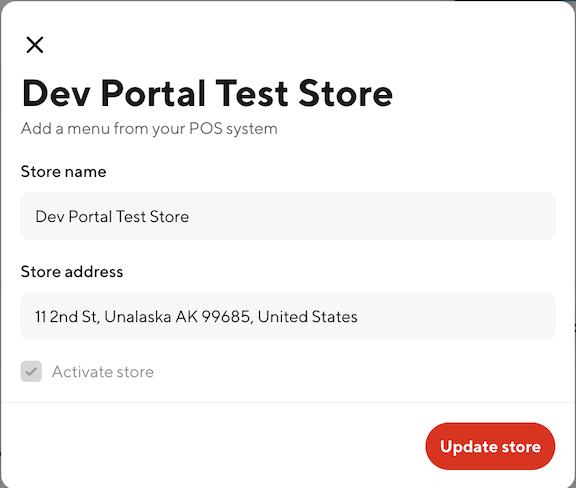
Step 4: Modify Store Address
In the edit dialog:
- Locate the Store address field
- Enter a new valid address for your test store
- Ensure the address is complete and properly formatted
Note: The address must be a valid, real address. DoorDash will validate the address format and may reject invalid or incomplete addresses.
Step 5: Save Changes
Click Update to apply the new address to your test store.
Update test store name
Step 1: Navigate to Stores within Developer Portal
Login to the DoorDash Developer Portal and navigate to the stores page in the Marketplace dropdown menu to view your test and/or production stores.
Step 2: Access Store Edit Options
For each store, there is an option to edit the store details after selecting the three dots next to the store.
Step 3: Select Edit Test Store
After clicking the three dots, select Edit test store from the menu options.
Step 4: Modify Store Name
In the edit dialog:
- Locate the Store name field
- Enter the new name for your test store
Step 5: Save Changes
Click Update to apply the new name to your test store.
Activate test store
Step 1: Navigate to Stores within Developer Portal
Login to the DoorDash Developer Portal and navigate to the stores page in the Marketplace dropdown menu to view your test and/or production stores.
Step 2: Access Store Options
For each test store, there is an option to activate the store after selecting the three dots next to the store.
Step 3: Activate Store
After clicking the three dots, you will see an "Activate Store" checkbox option in the menu. Check this box to activate your store.
Note: If you attempt to activate a store without a menu, you will receive an error message. Ensure you have first ingested a menu before activating.
Step 4: Verify Activation
Once activated, the store status will update to ACTIVE.
After your test store is activated:
- Create a test order to verify your integration
- Test the complete order flow from placement to completion
View your test store in Merchant Portal
Once you have a test store created and you are an administrator in your organization’s Developer Portal, you can log in to the DoorDash Merchant Portal to view the store from the merchant-facing perspective.
Merchant Portal Access
When a test store is created, DoorDash automatically creates a default business for your developer account (if one does not already exist).
- Merchant Portal access is granted at the business level, not the store level.
- Merchant Portal access is automatically provisioned to all developer members who exist at the time the business/test store is created.
- Any members added to the organization after the business is created will not automatically have access. These members must be manually added as operators in the Merchant Portal.
Tip: To ensure all developers in your organization have Merchant Portal access, add them to your developer organization before creating your first test store.