メインコンテンツへスキップ

7件の投稿件に「new-feature」のタグが付いています

すべてのタグを表示

· 読了目安時間 2 分
Brian Quach

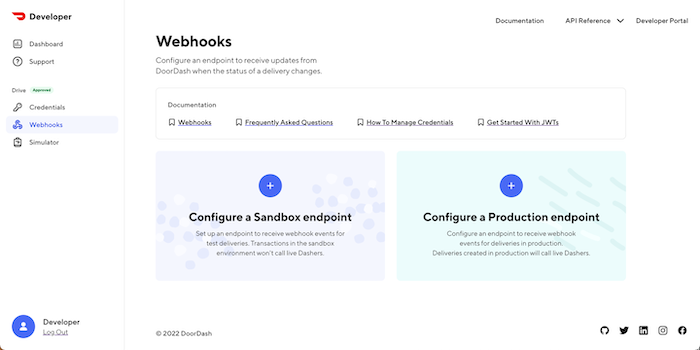
Webhooks are a critical part of a successful on-demand delivery integration. They enable DoorDash to inform your integration about delivery updates, like when the Dasher has arrived at the pickup location or where they are along their route in real time. This real-time information lets you keep both the sender and receiver of the delivery up-to-date with precisely what’s happening.

It can be challenging to develop and test the part of your integration that receives and handles webhooks. How can you confirm that DoorDash sent a webhook that you were expecting to receive? How can you confirm that your application parsed the webhook details correctly?

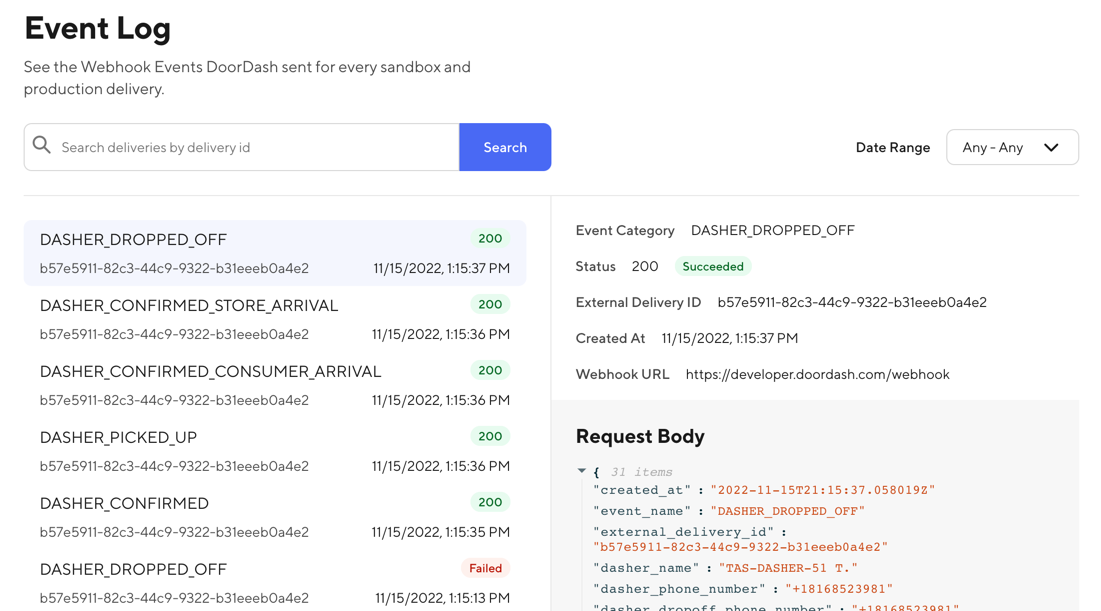
We’re introducing Event Logs to answer exactly those kinds of questions. Event Logs is a new view in the Developer Portal that shows a history of all the webhooks sent to your integration. Each log includes the endpoint to which the webhook was sent, the HTTP response code DoorDash received from that endpoint, and the full body of the webhook that DoorDash sent. You can search for all the webhooks for a particular delivery ID or inspect all of the webhooks that were sent in a specific date range.

A screenshot of the Event Logs view in the Developer Portal

Enroute webhooks & other Drive API updates

Alongside the new Event Logs, we’ve also brought some new features to the Drive API:

  • enroute webhooks can now be enabled for your integration, so you can receive frequent updates on the Dasher’s location
  • The new dasher_allowed_vehicles field enables you to specify the transportation methods that a driverDasher can use to make the delivery: "car", "bicycle" and/or "walking"
  • You can use the items field to provide more detail about what’s in the delivery; this detail can be seen by Dashers as they’re making the deliveries and by the receiver of the delivery on the tracking page

Event Logs and all of these new features are ready to use today! Check out the Event Logs view in the Developer Portal, and see the Drive API docs for more details on the new Drive API features.

· 読了目安時間 2 分
Ruirui Yang

Beer, wine, and even to-go cocktails are becoming an incredibly common addition to delivery menus for both restaurants and other verticals like grocery and convenience. Adding alcoholic drinks is a great way to boost your average order size and grow your delivery business. DoorDash Developer and the Drive API make it easy to start your own alcohol delivery business or add alcohol to your existing deliveries.

Get started with alcohol delivery

If you already have an active Drive API integration, submit a support ticket and ask for alcohol delivery to be enabled. One of our operators will reach out within a few business days with a brief legal addendum for you to sign. Once that’s signed, you can create an alcohol delivery just like you’d create a standard delivery. Just add/update a few fields in the body of your request to the create delivery API:

"order_contains": {
"alcohol": true
},
"action_if_undeliverable": "return_to_pickup",
"contactless_dropoff": false

If you’re new to Drive, get started using our tutorials for Postman, Node.js, or direct API calls. Then, follow the alcohol delivery how-to guide.

Compliance is key

For all of the deliveries done through DoorDash’s network of Dashers, and especially for deliveries of regulated items like alcohol, we work hard to comply with local laws. Our product prompts Dashers to scan the customer’s ID and, in some jurisdictions, to collect the customer’s signature before delivery. Our Drive product only allows alcohol deliveries in jurisdictions where alcohol delivery is legally permissible, but it is your responsibility to ensure that you (or the merchants using your services) have the required retail alcohol licenses, and that you are only requesting delivery of the types of alcohol that are allowed under your license and local laws.

Next steps

Jump into alcohol delivery using our alcohol delivery how-to guide. We can’t wait to see the businesses you build and grow using Drive and alcohol deliveries.

· 読了目安時間 2 分
Kavya Vishwanath

Goods are commonly delivered by a business–a merchant that owns a collection of stores–and from a store: a physical location that prepares the goods for delivery. Accordingly, DoorDash maintains a data model of businesses and stores. This model helps us make faster and more accurate deliveries by ensuring that we have the right store location before a delivery is requested and allowing us to store additional information about how a Dasher can correctly locate a store. Now, in both the Drive and Drive (classic) APIs, you can create businesses and stores and then create deliveries for those stores.

Using businesses & stores

Using businesses and stores in your Drive API integration is straightforward: just create a business and create a store(s) underneath it using calls to the business & store APIs. Then, when creating a delivery or requesting a delivery quote, provide the pickup_external_business_id and pickup_external_store_id that you used when creating the business and store.

POST /drive/v2/deliveries

{
"external_delivery_id": "D-1763",
// other fields

"pickup_external_business_id": "b-234-dzs",
"pickup_external_store_id": "s-475-fnr",
}

When you create a delivery that provides business and store IDs, the store's address and contact details are used, so you don't have to provide them in every delivery request. Additionally, by creating stores in advance, you can verify that DoorDash's address resolution system saved the correct address for your store, which helps Dashers get to the right pickup location every time. Creating businesses and stores for your deliveries also lays the groundwork for getting access to future delivery capabilities that require additional, business-level configuration, like delivery for alcohol and prescriptions.

When you're ready to start using businesses and stores:

Drive (classic) user?

For Drive (classic) users who've previously managed stores using external forms or auto-onboarding, we're making it easier to manage the businesses and stores that you need in order to make deliveries. Your account manager or point of contact at DoorDash will be in touch with more details soon, but if you want to get a head start, use the upgrade guide that's right for your scenario:

· 読了目安時間 2 分
Jon Collette

Software development is more fun with teammates! Since launching DoorDash Developer, many of our early adopters have told us that they want to be able to share important information about their integration with DoorDash–things like simulated deliveries and access keys–with members of their team. I'm excited to announce that you can now do just that, with Organizations.

Organizations contain your members

You can see and add members on the Organization page in the Developer Portal. At launch, you can add up to 49 other people to collaborate with you. All you need to add a new member is their email address.

A screenshot of the organization members page in the Developer Portal

Organizations contain your billing and business details

Previously, DoorDash Developer combined your personal details with the details about your business: your business name, how you pay for deliveries, etc. Now, Organization Settings holds all these details, so everyone on your team can manage them.

Get started

If you're already using DoorDash Developer, head to the Organization page in the Developer Portal to add your first member!

If you're new to DoorDash Developer, sign up in just a few steps.

· 読了目安時間 2 分
Alex Mullans

Over the past few months, we've been hard at work unlocking new scenarios and adding new features to the DoorDash Drive API. With return-to-pickup, you can now deliver non-perishable and high-value goods that need to be returned to you if the customer is unavailable. If you use OAuth to protect your internet-facing endpoints, Drive and Drive (classic) can now send webhooks authenticated with OAuth. And, with invoiced billing support, you can choose to receive a monthly invoice for your deliveries, rather than paying upfront with a credit card.

Return to pickup

In the event a customer is unavailable to receive a food delivery, DoorDash first tries all available methods to reach the customer but, if we're not successful, the Dasher will dispose of the delivery. For higher-value goods and non-perishable goods, it's often preferable to have the delivery returned to its pickup location if the customer is unavailable. Now, you can, by creating "return-to-pickup" delivery using the Drive API!

Read the return to pickup how-to guide for more details, or just use the action_if_undeliverable=return_to_pickup field when you call the delivery creation API

OAuth webhooks

Previously, DoorDash could only send webhooks to unauthenticated endpoints and endpoints protected by HTTP Basic authentication. We heard from many of you that your IT and Security teams preferred to protect all internet-facing endpoints with OAuth instead. So, we've added OAuth as a new option for webhook authentication. Learn more in the webhooks how-to guide.

A screenshot of the modal for creating a new webhook endpoint

Invoiced billing

If you're a platform business that serves a variety of merchants, each with their own customers, you might like the ability to pass on charges, like DoorDash's delivery fees, to those merchants. Previously, the Drive API charged you (the developer) for each delivery as you created them. Now, you can request to receive a monthly invoice that can be paid by credit card or ACH transfer. Submit a support request to get started.

· 読了目安時間 3 分
Alex Mullans

The Drive APIs bring the power of DoorDash’s same-day local delivery to your application. You can build an app, using any programming language and runtime you want, to deliver goods from you to your customers–or from your customers back to you! Your application calls the APIs, and Dashers deliver your goods. Now, to make it even faster to add delivery to your application, we’re introducing SDKs for common languages, starting with JavaScript.

The new DoorDash Node.js SDK takes care of the boilerplate work of using our API, like setting up the authentication token and making HTTP requests. SDKs generally make it faster to use an API because they take care of this boilerplate work so you can get right to the task you’re trying to achieve–say, creating a delivery and requesting a Dasher. They can also help you write code more quickly because your code editor can provide inline documentation and autocomplete suggestions.

In the screenshot below, the code on the left creates a delivery using the Create Delivery API directly; the code on the right, using the DoorDash Node.js SDK.

A screenshot comparing JavaScript code calling the APIs directly vs. using the DoorDash Node.js SDK

Install the SDK to get started

Getting started with our Node.js SDK is easy: just run npm i --save @doordash/sdk to install it from npm and then reference it in your application.

The SDK's readme contains snippets showing you how to use the SDK in both JavaScript and TypeScript. If you don’t have the access key details needed to create the client, you can create them in the Developer Portal.

Note: You must be using the new Drive APIs, not the Drive (Classic) APIs, to use the DoorDash Node.js SDK.

Examples of using the SDK

Here’s a simple example of creating a delivery in JavaScript:

import { DoorDashClient } from '@doordash/sdk'
import { v4 as uuidv4 } from 'uuid'

const client = new DoorDashClient({
developer_id: '{your developer_id}',
key_id: '{your key_id}',
signing_secret: '{your signing_secret}',
})

const response = await client.createDelivery({
external_delivery_id: uuidv4(),
pickup_address: '1000 4th Ave, Seattle, WA, 98104',
pickup_phone_number: '+1(650)5555555',
dropoff_address: '1201 3rd Ave, Seattle, WA, 98101',
dropoff_phone_number: '+1(650)5555555',
})

And here’s one in TypeScript:

import {
DeliveryResponse,
DoorDashAuthorizationError,
DoorDashClient,
DoorDashResponse,
} from '@doordash/sdk'

import { v4 as uuidv4 } from 'uuid'

const client = new DoorDashClient({
developer_id: '{your developer_id}',
key_id: '{your key_id}',
signing_secret: '{your signing_secret}',
})

client
.createDelivery({
external_delivery_id: uuidv4(),
pickup_address: '1000 4th Ave, Seattle, WA, 98104',
pickup_phone_number: '+1(650)5555555',
dropoff_address: '1201 3rd Ave, Seattle, WA, 98101',
dropoff_phone_number: '+1(650)5555555',
})
.then((response: DoorDashResponse<DeliveryResponse>) => {
// do something
})
.catch((err: any) => {
// handle error
})

As the DoorDash Developer community grows, we expect to create more SDKs in additional languages. Bookmark our blog to stay updated.

· 読了目安時間 2 分
Alex Mullans

We commonly hear from DoorDash customers that they love being able to track their delivery in the DoorDash app: “Has the Dasher arrived yet?” “How far away are they?” “Are there any problems?” We've also heard from developers using the DoorDash Drive APIs that it’s important for you to be able to answer those questions in the apps you’re building.

We’re excited to announce that you can now use webhooks in apps that use the Drive API. (If you’re using Drive Classic, webhooks are already supported.) Webhooks enable near-real-time information flow from DoorDash and our Dashers to your application and your customers. With webhooks, you can enable real-time scenarios like a map view showing your customers how far away their Dasher is, push notifications telling your customers the latest status of their order, and much more. You can get this information flowing in just a few hours of dev time, using the same skills and techniques you use to call the Drive API.

An animation of code being written to receive a webhook event and print a message

Configure webhooks in the Developer Portal

To set up your webhook endpoint, visit the webhooks page in the Developer Portal. Then, click the plus symbol and fill in the details of the endpoint in your app that will receive the webhooks from DoorDash.

A screenshot of the webhooks page in the DoorDash Developer Portal

Webhook events for the entire delivery journey

At launch, the Drive API provides webhooks for events like DASHER_CONFIRMED–when a Dasher has accepted your delivery and is on the way to pickup–and DASHER_DROPPED_OFF–when the delivery is complete. Visit the webhooks docs to see all of the webhooks your app should be prepared to receive.

Get started

When you’re ready to jump in with webhooks, just visit the webhooks page in the Developer Portal to get started. If you’re new to DoorDash Developer, you can also learn more in the DoorDash Developer introduction.