Order Management Webview User Guide
How to access the webview?
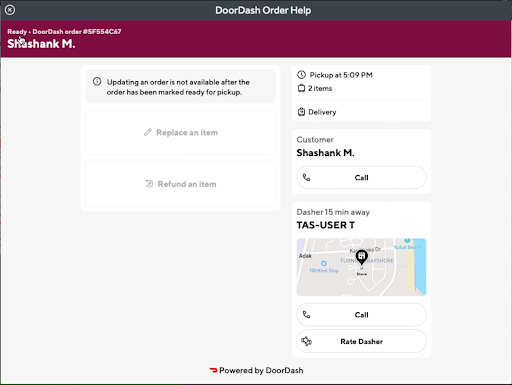
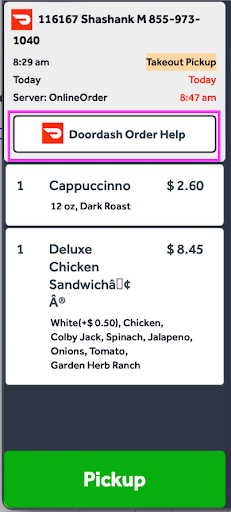
Tap on the DoorDash Order Help to open the webview for the order.
 |
|
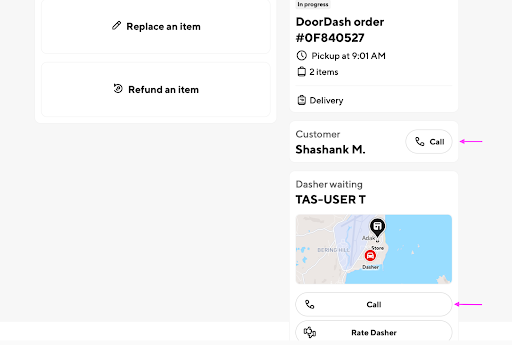
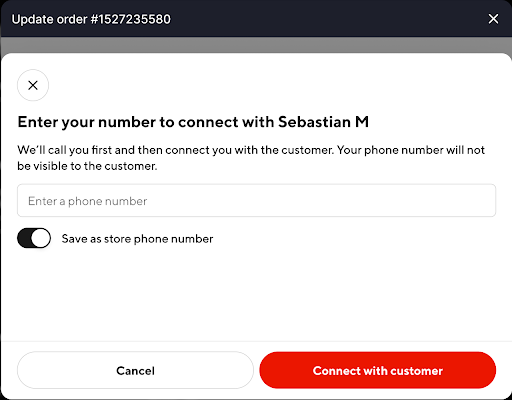
How to Call a Customer or Dasher?
- Open the webview for the order.
- Tap on the phone icon for Customer or Dasher depending on who you are looking to call.
-
[Only for the first call; future calls go straight to step #4]
Enter the phone number where you would like DoorDash to connect you with the Customer or Dasher. This number is stored for future calls.
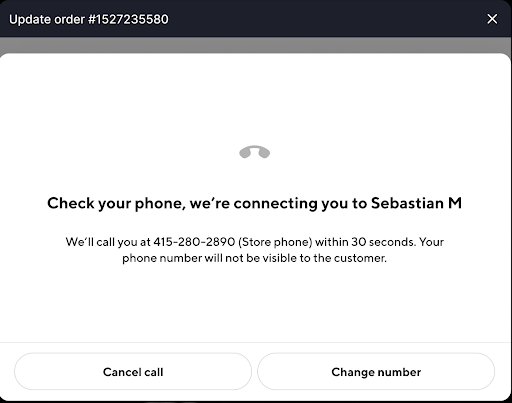
- You will receive a call from DoorDash.
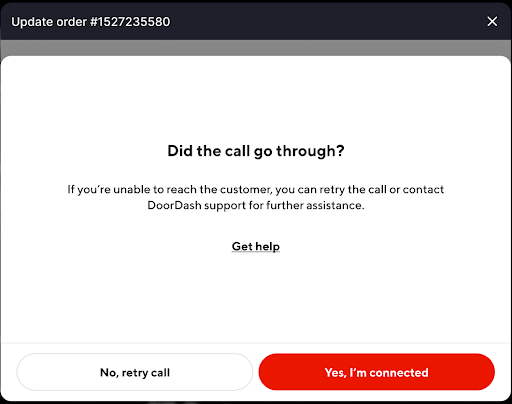
- Confirm that the call was connected. If not, then you have the option to retry with a single tap.
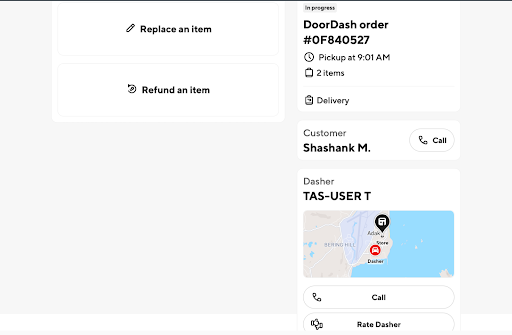
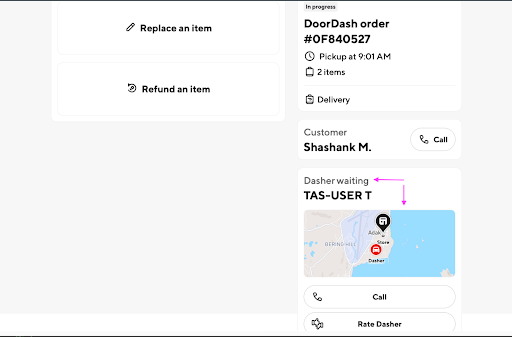
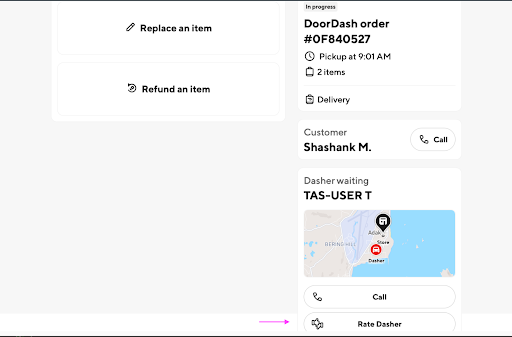
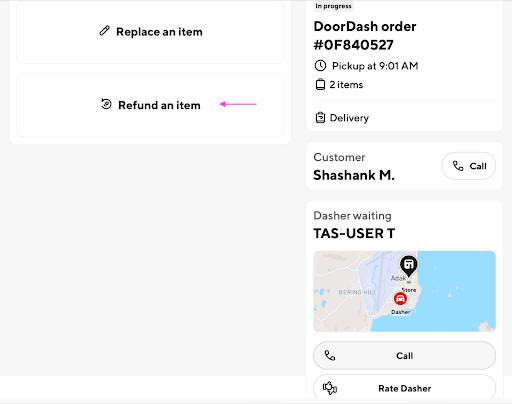
How to Track a Dasher?
- Open the webview for the order.
- View the dynamic Dx status and the position on the map.
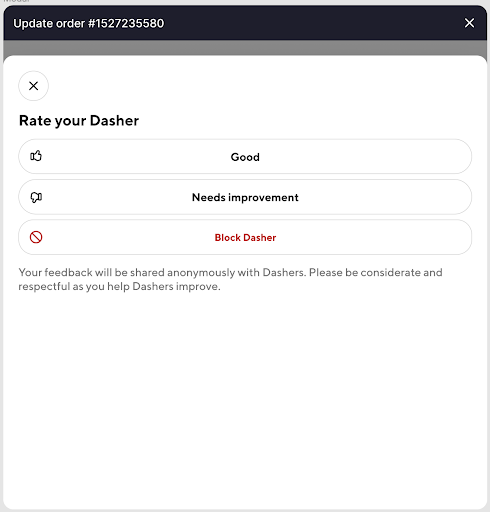
How to Rate a Dasher?
- Open the webview for the order.
- Tap on the rate dasher button.
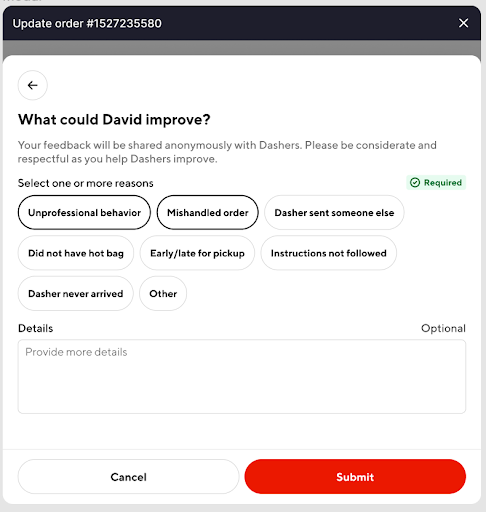
- Select an option based on the type of rating.
- Select one or more reasons why the particular rating. You even have the option to provide more context through a free text entry field.
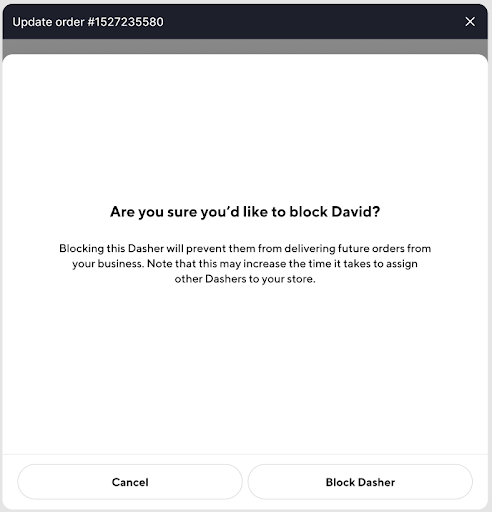
How to Block a Dasher?
- Open the webview for the order.
- Tap on the rate dasher button.
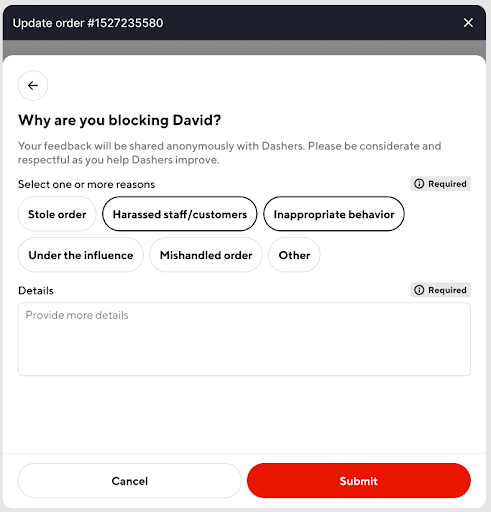
- Select 'Block Dasher' from the listed options.
- You are required to select a reason for the block and provide more details from the free text input field.
- Finally, you are asked to confirm the block.
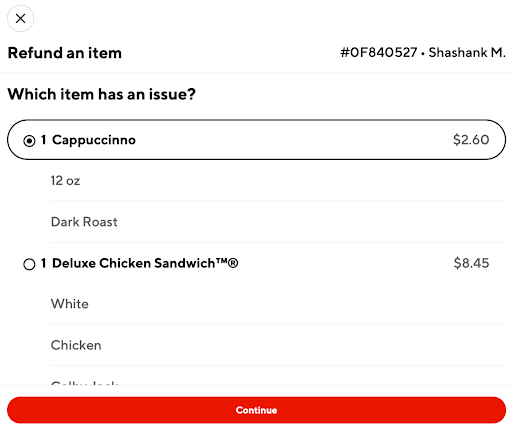
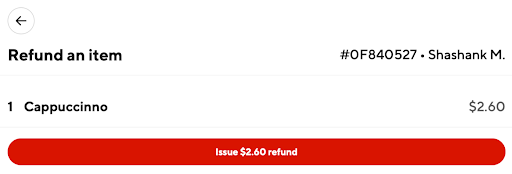
How to Refund an Item?
- Open the webview for the order.
- Tap on the 'Refund an item' button.
- Select the item that needs to be refunded and then tap on 'Continue'.
- Confirm the refund.
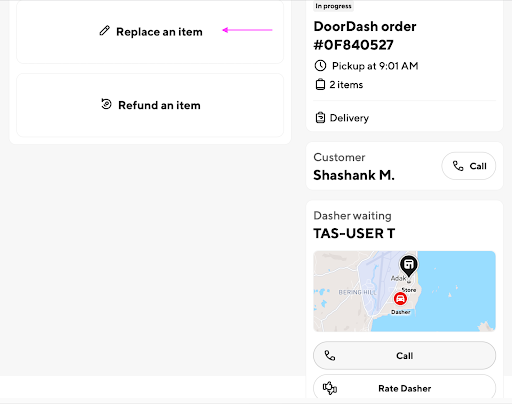
How to Replace an Item?
- Open the webview for the order.
- Tap on the 'Replace an item' button.
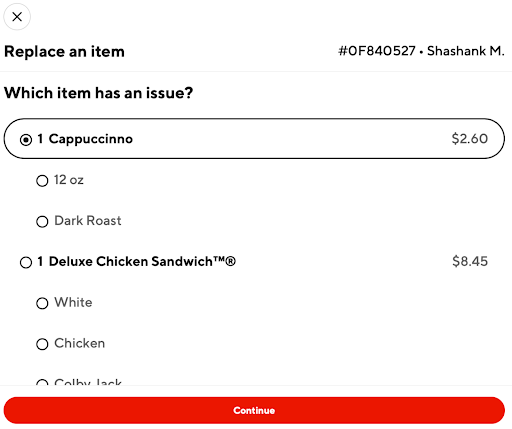
- Select the item or modifier that needs to be replaced and then tap on 'Continue'.
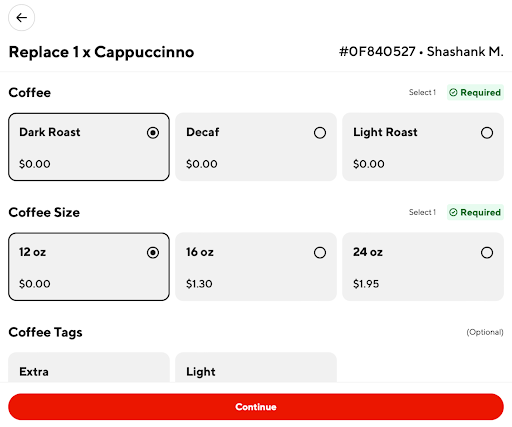
- Select the replacement from the preferred category of items and then tap on 'Continue'. You also have the option to search for the item if it isn't easily visible.

- Select the modifiers for the replacement. For example, in this case, the Cold Brew needed a roast type and size selection.
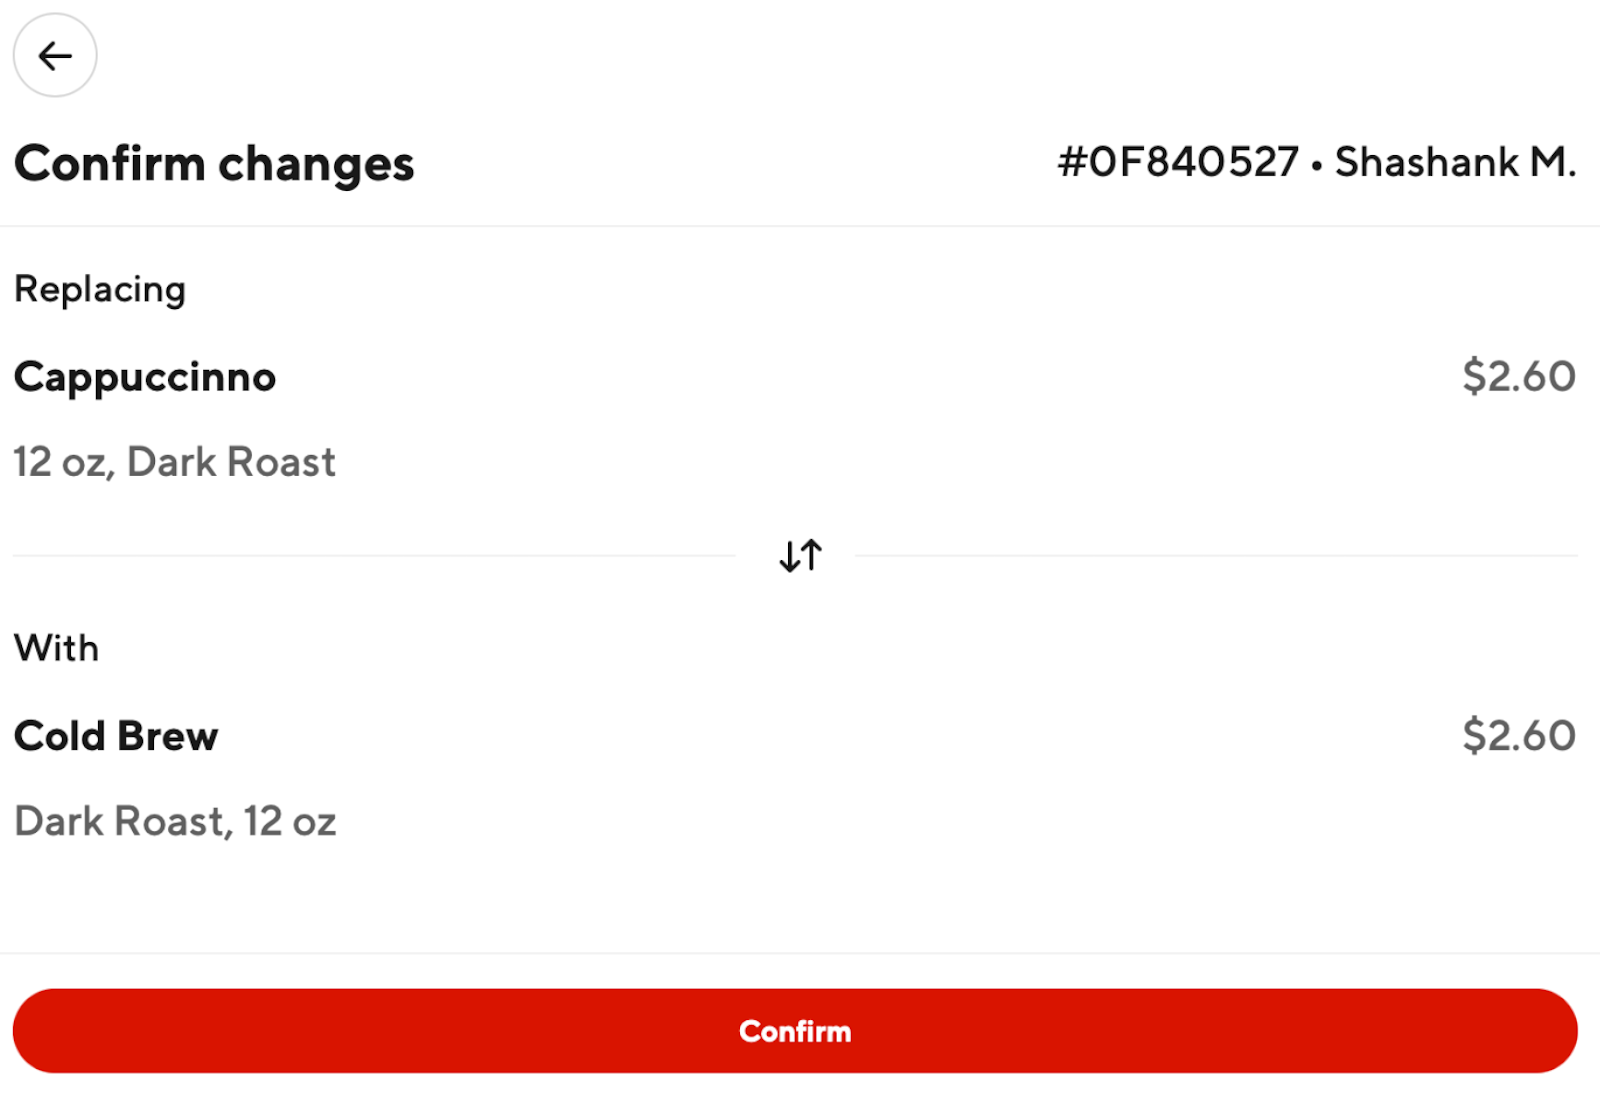
- Finally, confirm your replacement.
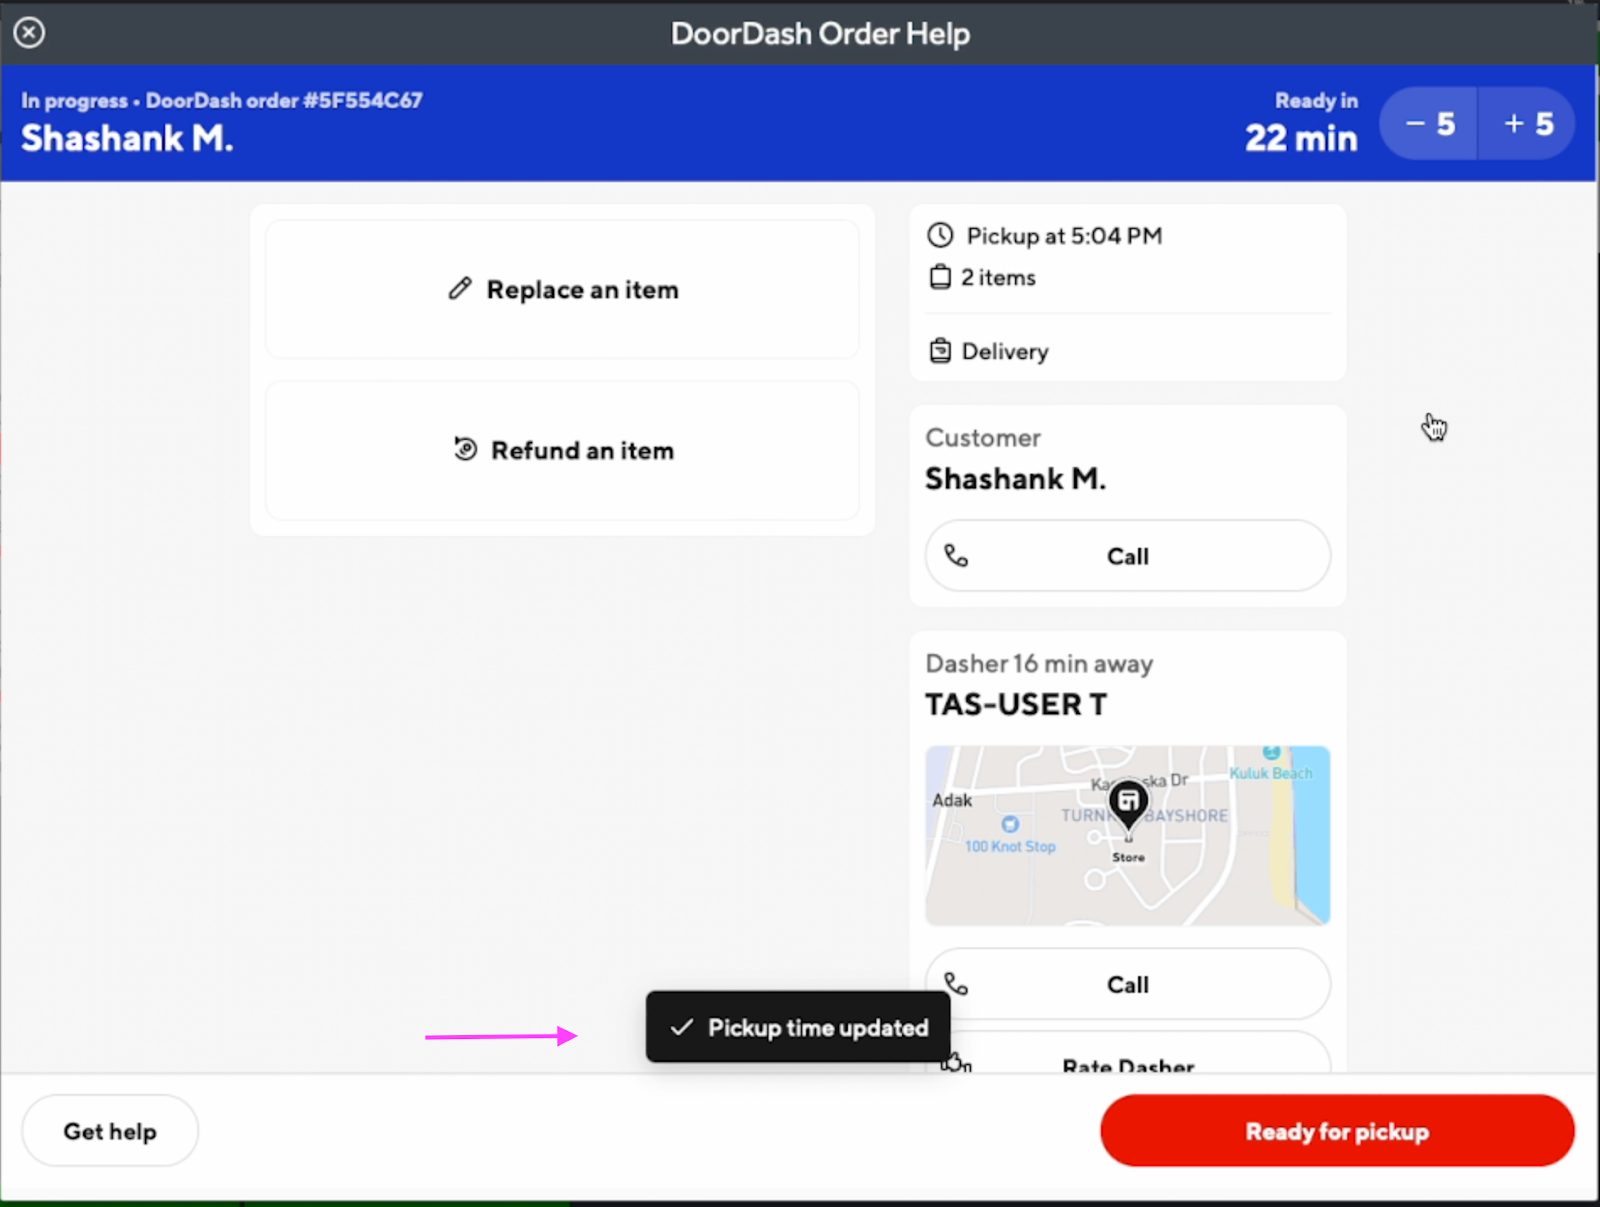
How to Adjust Pickup Time for an Order?
- Open the webview for the order.
-
Tap on the '+5' or '-5' buttons to adjust pickup time by +5 or -5 minutes
Note: if you increase the Pickup time of an order after a Dasher is already assigned then we will not be able to change their arrival time. However, we will inform the Customer about the delay.
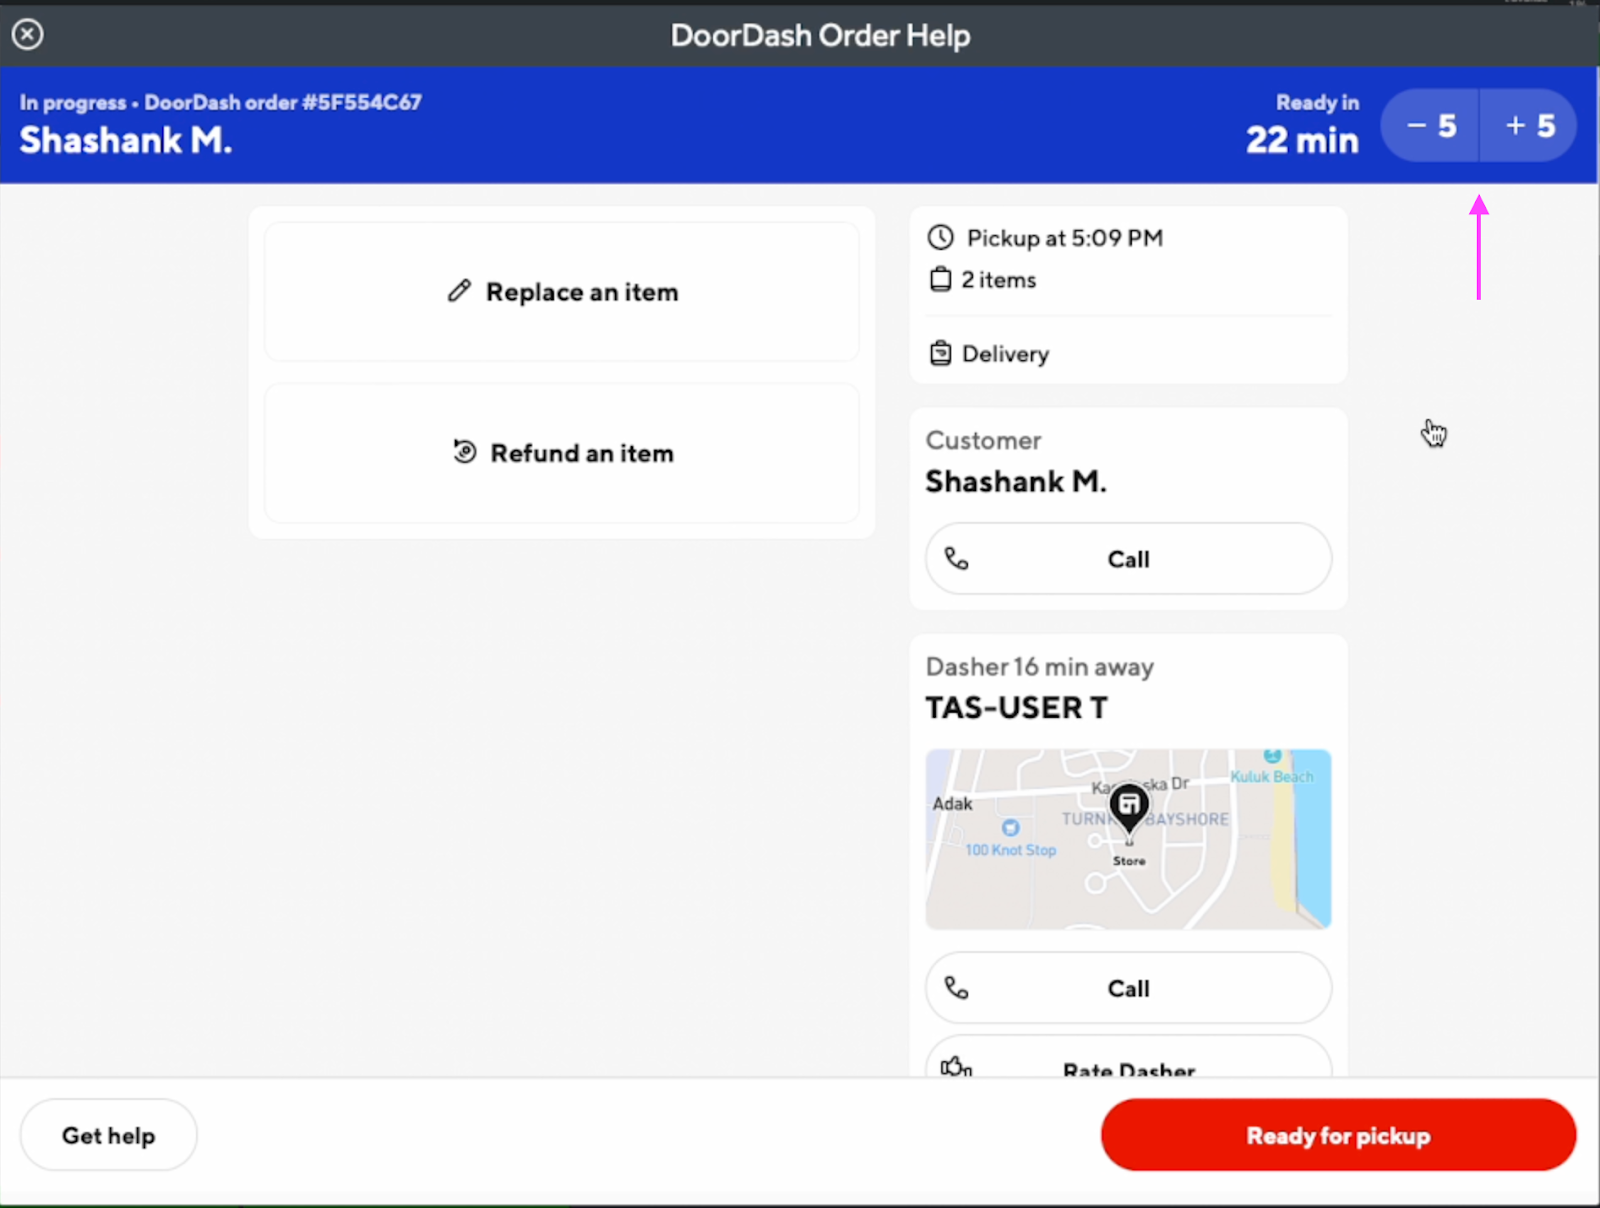
- The Plugin automatically confirms the changes by updating the ready in countdown timer and Pickup time.
How to Mark an Order Ready for Pickup?
- Open the webview for the order.
- Tap on the 'Ready for pickup button'.

- After a few seconds, the Plugin automatically updates the order status.