Get started (WooCommerce Plugin)
Production access to the Drive API is currently restricted, and we cannot provide a timeline for certification following development. If you have not completed development and submitted a production access request, we recommend pausing development. Contact us here to record your interest.
This tutorial will introduce you to the Local Delivery by DoorDash plugin for WooCommerce. It assumes you're familiar with the basics of WordPress and WooCommerce. If you'd like to learn the Drive APIs by writing code, you should use the Get started (Node.js SDK) tutorial or Get started (API) tutorial instead.
Table of contents
- Sign into the Developer Portal
- Create an access key
- Install the Local Delivery by DoorDash plugin for WooCommerce
- Create a delivery
- Use the Delivery Simulator
- Get the status of your delivery
- Finish up
Prerequisites
- A valid SSL certificate is required.
- PHP version 7.4 or higher.
- A functional WordPress and WooCommerce installation.
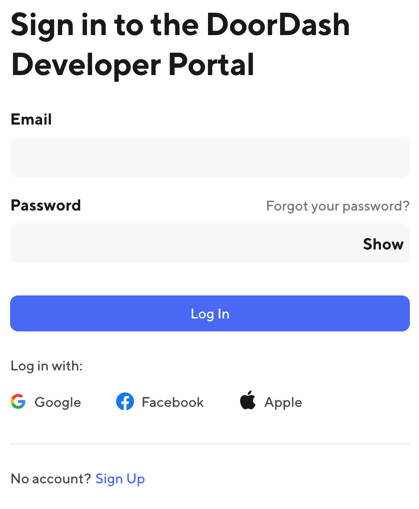
Sign into the Developer Portal
Go to the
Developer Portal
using the link in the top right corner of this page. If you already have a DoorDash account, enter your email and password and sign in; if not, or if you want to use a different account for development, click Sign Up and follow the process to create an account.
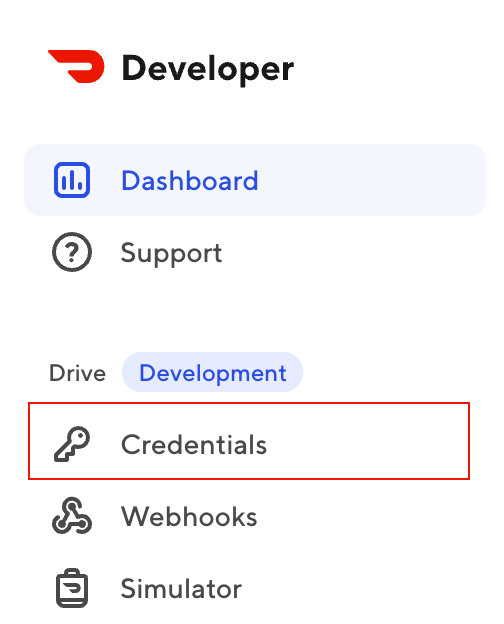
Create an access key
In the left navigation, click Credentials.
On the Credentials page, click the plus (+) icon in the center of the page to create a new access key. You'll use this access key to create a JSON Web Token (JWT) that you can use to make requests to the Drive API.
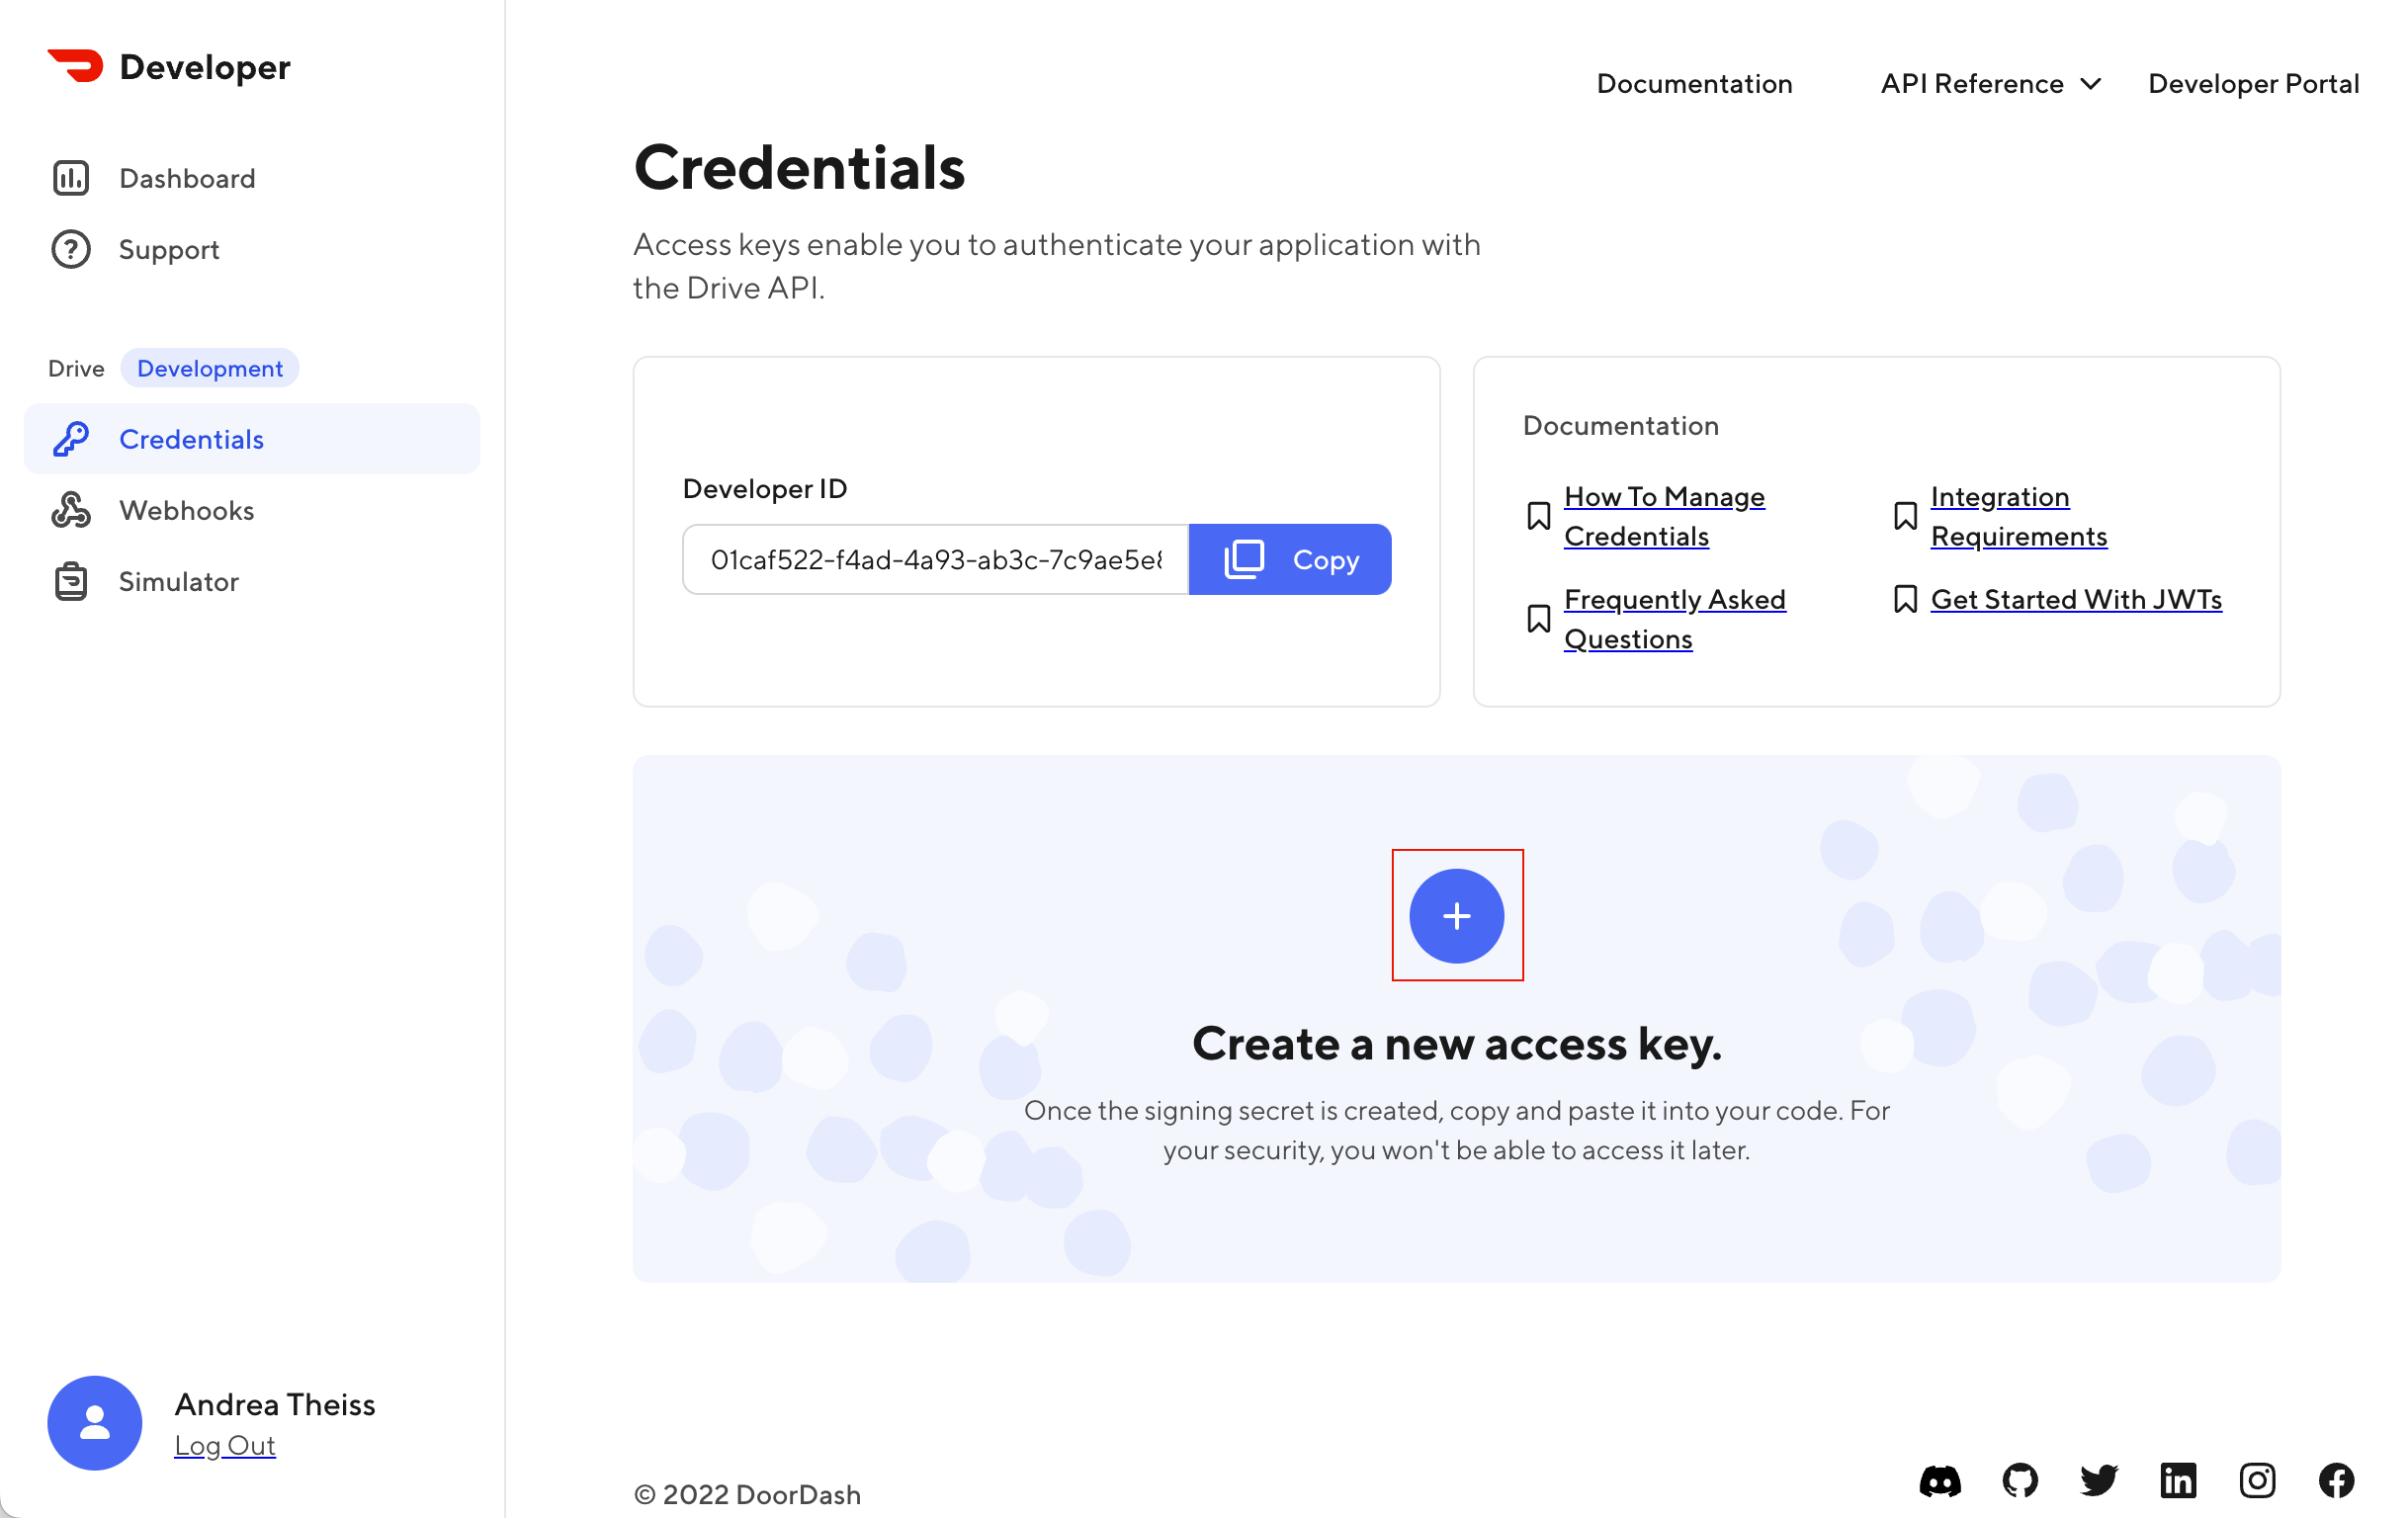
Name your key test-app and click Create Access Key.

Click Copy to copy the access key to your clipboard and then paste it somewhere where you can access it later in the tutorial.

Install the plugin
Installation
Follow the instructions below to install the Local Delivery by DoorDash plugin.
From Local Delivery by DoorDash from within WordPress
- From your dashboard, navigate to Plugins > Add New.
- Search for
Local Delivery by DoorDash. - Click Install Now.
- Click Activate, after the plugin downloads.
Install Local Delivery by DoorDash Manually
- Upload the
woocommerce-doordashfolder to your/wp-content/plugins/directory. - Activate the Local Delivery by DoorDash plugin by visiting Plugins > Installed Plugins and clicking Activate.
Configuration
After installation, a new tab will be added under WooCommerce > Settings called “Local Delivery by DoorDash.” Use the controls on this page to configure your connection with DoorDash, create an API user for DoorDash to update your orders with delivery status information, and manage the pickup locations for your deliveries.
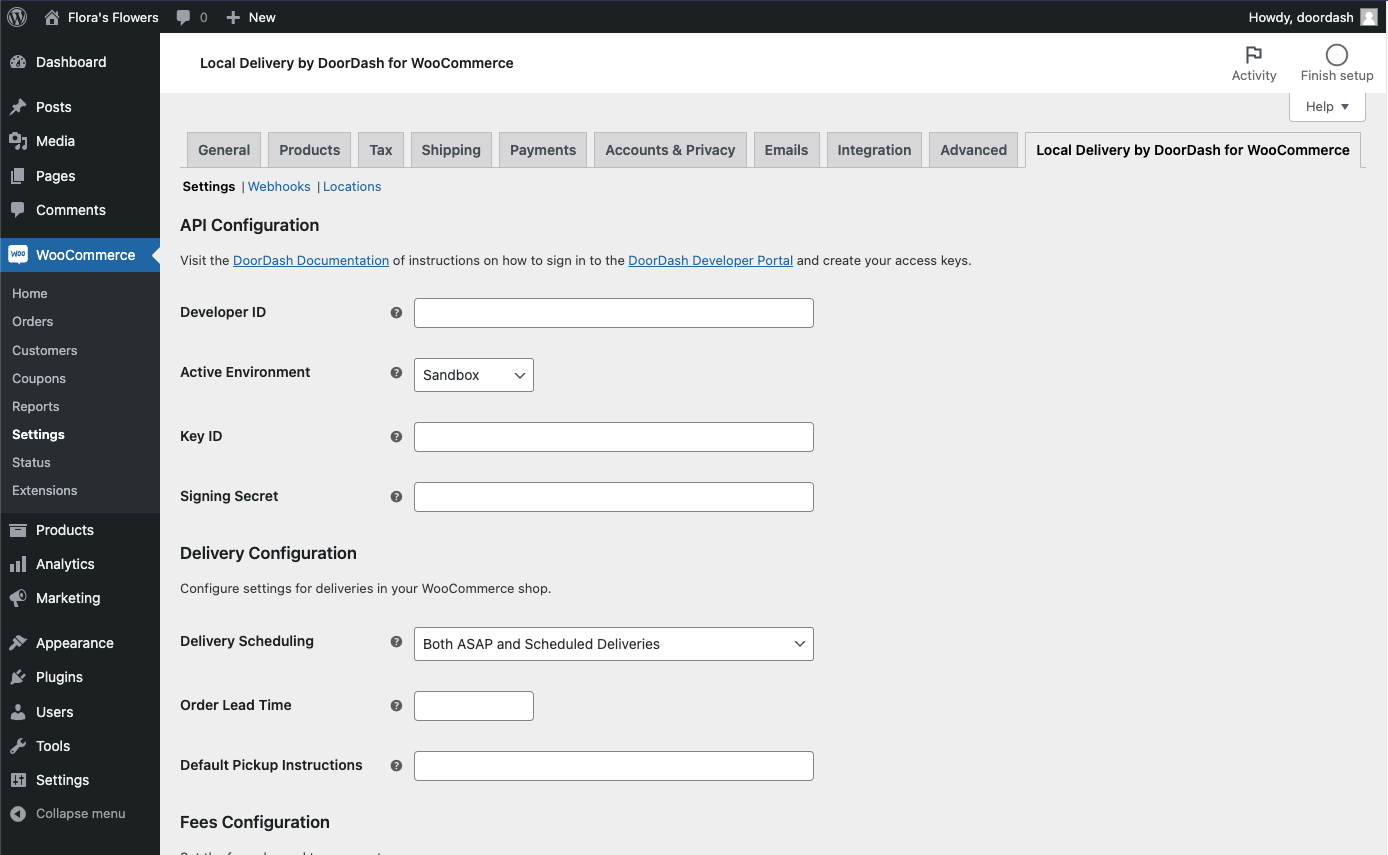
Local Delivery by DoorDash settings screen
Settings Tab
The first tab contains general configuration settings for the plugin, allowing you to connect the plugin to the DoorDash API, configure the types of deliveries your store offers and the fees that will be charged to customers, and the default delivery hours for your store.
API Configuration
If you don’t already have one, you will need to create an account on the DoorDash Developer portal to be able to create deliveries. After your account is created, you can follow the instructions on the DoorDash Developer documentation on creating and managing credentials to generate your Developer ID, Key ID, and Signing Secret.
Developer ID
This ID identifies your user on the DoorDash Developer Portal and is used to connect to the DoorDash Drive API. Paste the value of the developer_id generated with your access keys in this field. Note: Your developer_id will remain the same for all sets of credentials within your DoorDash Organization.
Active Environment
The DoorDash Drive API provides Sandbox and Production modes. Sandbox mode can be used for testing your integration and will not create live deliveries. Production mode will dispatch a DoorDasher to complete a delivery. The plugin allows for separate Sandbox and Production keys to be entered in the configuration, and the active mode can be selected with this dropdown.
Key ID and Signing Secret
After generating your Access Keys, paste the appropriate values in these fields to allow your site to communicate with the DoorDash Drive API. Both Production and Sandbox keys are saved.
Delivery Configuration
These settings allow you to select the desired parameters for deliveries from your store.
Delivery Scheduling
There are two types of delivery available. Either or both can be offered to customers.
- Scheduled Deliveries allow users to choose a time for their delivery. Available times are limited by the configured delivery hours for your shop or the selected location.
- ASAP Deliveries will be delivered in the next available delivery window, as limited by the location hours.
Select both ASAP and Scheduled Deliveries to allow customers to choose their delivery type.
Order Lead Time
This value is the number of minutes that are required to fill an order before a DoorDasher should arrive. In retail environments, this might be just 10 minutes to allow an employee to pick a product and bag it for the DoorDasher. For restaurant environments, this value might be 60 minutes to allow for an order to be prepared by the kitchen. In some cases, this value might be much higher to allow for preparation of more complex orders.
Default Pickup Instructions
The text in this field will be sent through the DoorDash app to the DoorDasher assigned to the delivery. These are instructions for the Dasher to follow upon pickup of the order. This can be overridden on a per-location basis.
Fees Configuration
These settings configure the fees charged to your customers for DoorDash delivery. Note: DoorDash rates are paid by the shop owner. See the documentation.
Delivery Fees Mode
This setting controls the type(s) of fees charged to your customers for DoorDash delivery. There are three options:
- No charge for customer (shop pays) allows you as the shop owner to cover the cost of delivery for the order.
- Charge customer the quoted DoorDash rate will pass the quoted cost on to the customer as a shipping charge in WooCommerce.
- Charge customer a fixed rate allows for a fixed price to be set for delivery.
Delivery Fee
When used with Charge customer a fixed rate, the amount entered in this field will be added to the order as a shipping charge. When used with Charge customer the quoted DoorDash rate, this amount will be added to the quoted DoorDash rate.
DoorDasher Tipping
This setting allows for tipping for DoorDashers to be disabled. This is not recommended as tips can help an order get accepted by a Dasher more quickly. 100% of the tip goes directly to the Dasher.
Default Delivery Hours
Default delivery hours will apply to all locations that do not have their own delivery hours configured. This is helpful when you have many locations that all offer the same hours.
Enter hours for each day with a dash separating the opening and closing time, eg 10:00am - 8:00pm. Multiple ranges can also be entered separated with a comma, eg, 10:00am - 1:00pm, 4:00pm - 7:00pm. Make sure you have configured your Timezone in your WordPress settings under Settings > General. If deliveries are not offered, leave the field for that day blank.
Webhooks configuration tab in Local Delivery by DoorDash settings
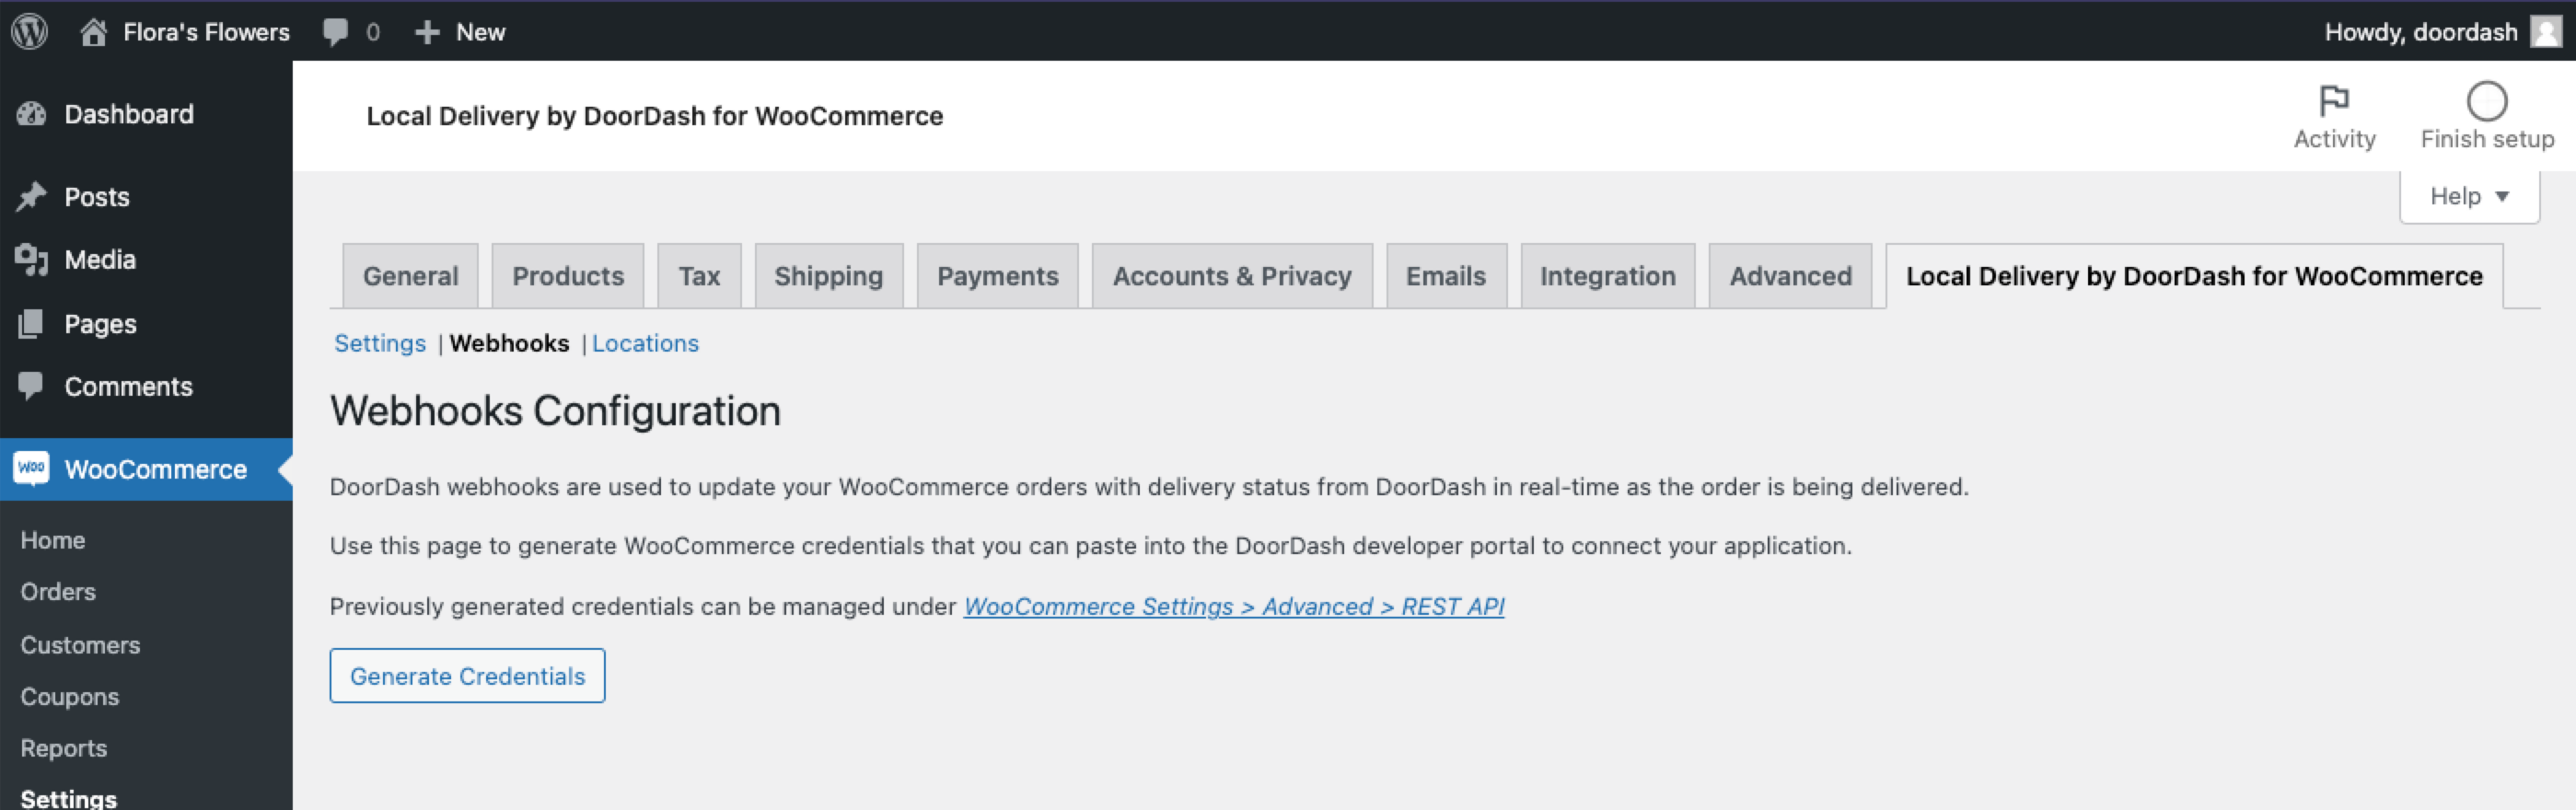
Webhooks Tab
Webhooks are events that fire when a certain action has been completed. In the case of the DoorDash Drive API, these events pertain to the lifecycle of a delivery. Webhooks are sent out of DoorDash when a delivery has been accepted, when the Dasher arrives at the pickup, when the order is delivered, etc.
This settings page helps configure WooCommerce to receive webhooks fired from DoorDash, which allows for WooCommerce Orders to be updated with information about the delivery as it’s happening. It also provides values for configuring webhooks in the DoorDash Developer Portal. When DoorDash updates the status of a delivery, the webhook will trigger and update that order with a note and status change in WooCommerce.
Click the Generate Credentials button to create an API user for DoorDash in WooCommerce. This will direct you to the following screen:
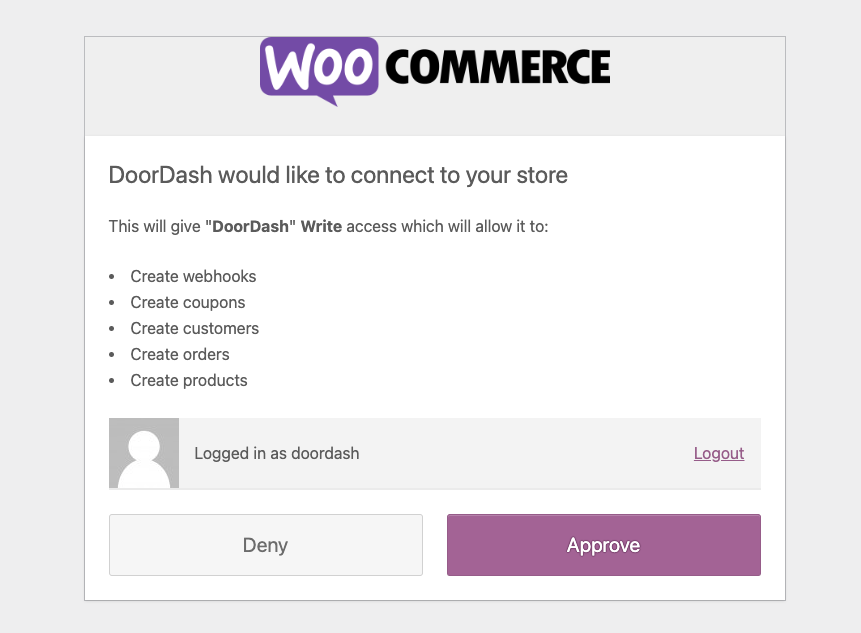
WooCommerce authorization screen
Click the Approve button to allow the plugin to create a new API user. API users can also be managed under WooCommerce Settings > Advanced > REST API.
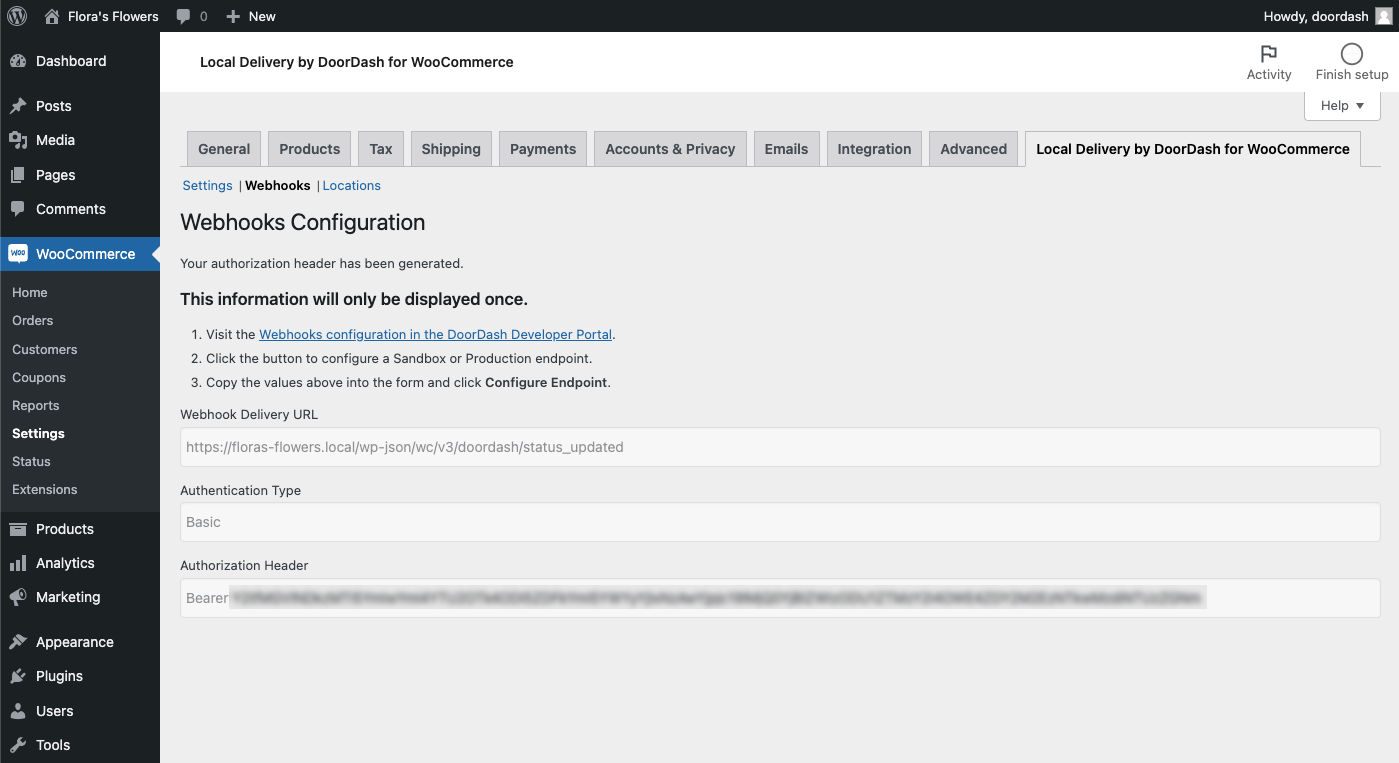
Webhooks configuration screen with newly generated credentials
You will then be redirected back to the Webhooks Configuration screen, where your configuration details will be displayed.
This information will only be displayed once. For security reasons, the Authorization Header will be deleted from the database immediately after it is displayed. Make sure to save this information in a safe place. However, if this information is lost, you can generate a new API user from this page.
Now follow the instructions to configure your webhook in the portal. Use the delivery URL, Authentication Type, and Authentication Header displayed on the Webhooks configuration page.
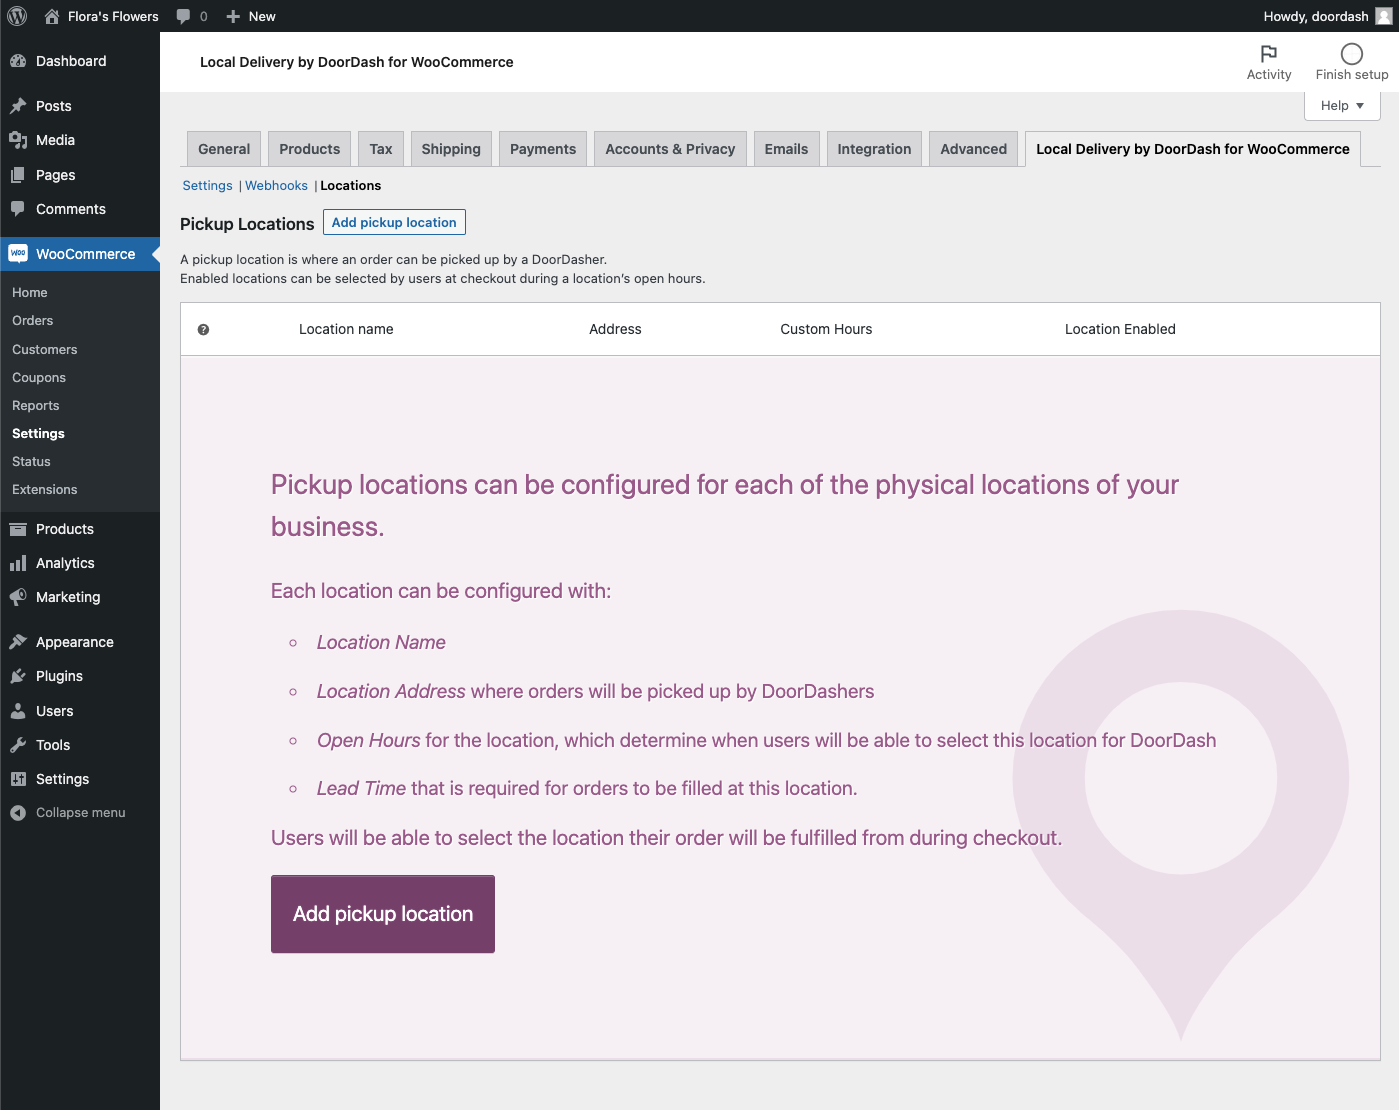
Multiple locations can be configured on the Locations screen.
Locations
Local Delivery by DoorDash allows shop owners to configure multiple pickup locations for your business. Each location can be configured with a location name that is displayed to the user, the address where orders will be picked up by DoorDashers, delivery hours for that location. Each location can also be configured with an individual email address which can be used to monitor new orders to be fulfilled from that location.
Click the Add pickup location button to add your first location.
Location editor screens
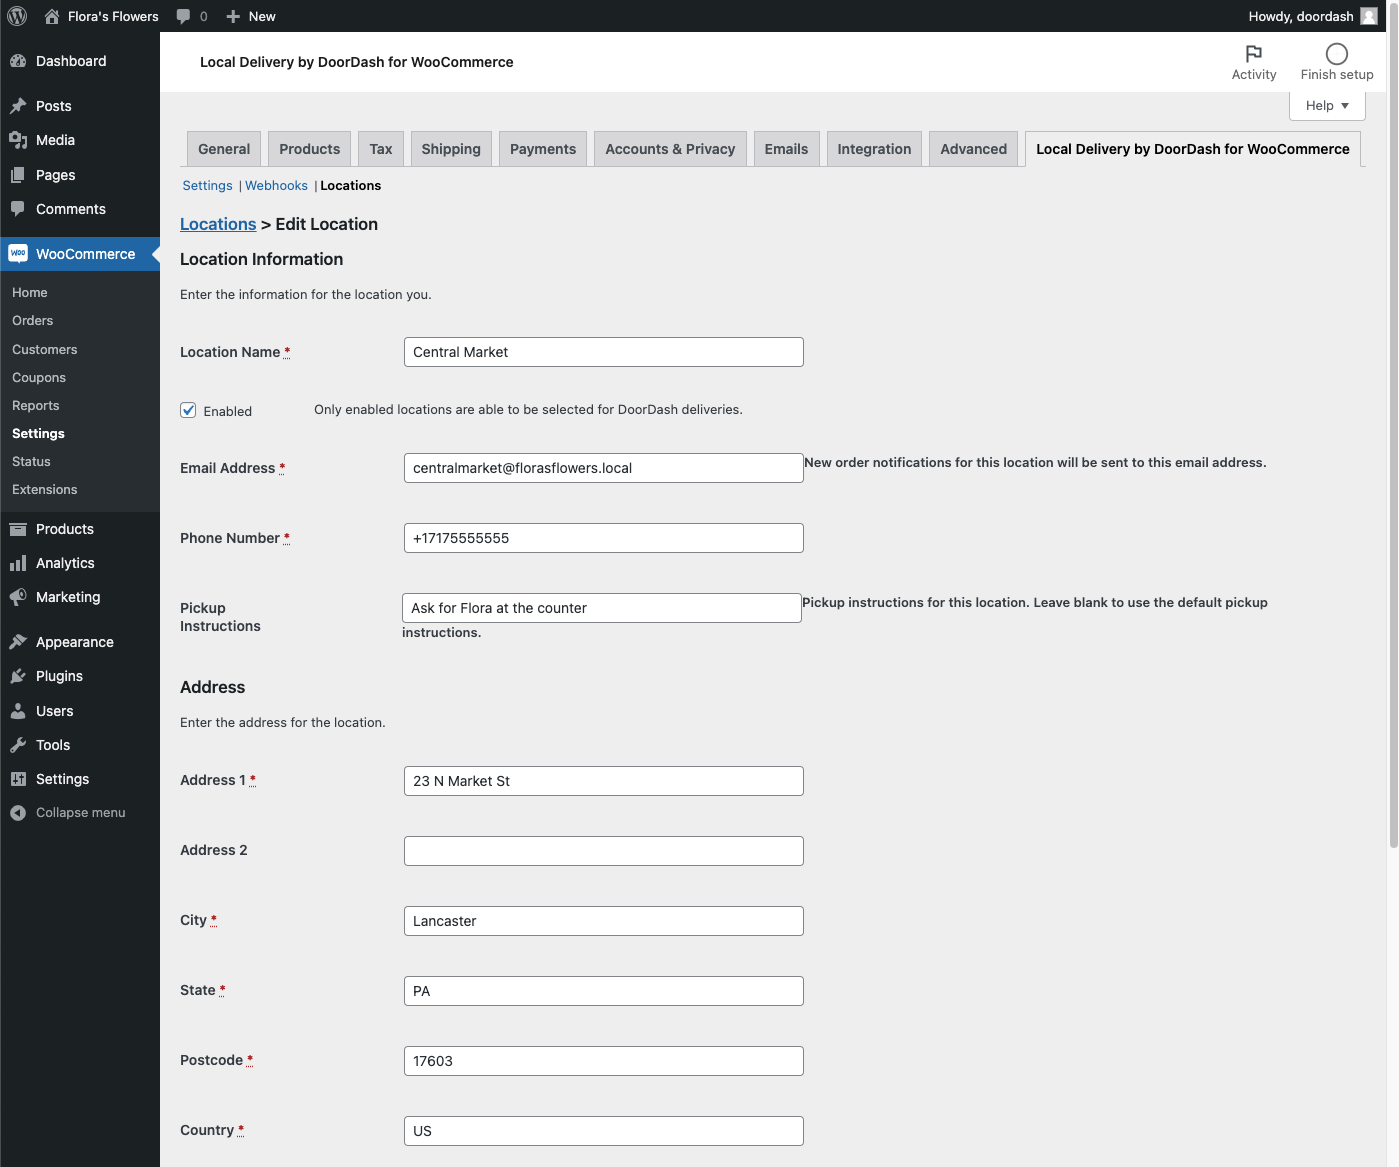
Location Information
Location Name
This is the name for this location that will be displayed to customers when selecting a location for their order to be fulfilled from.
Enabled
If disabled, this location will not be displayed as an available location for DoorDash delivery.
Email Address
New order notifications for this location will be sent to this email address (in addition to your configured WooCommerce admin email). This allows for individual locations to have a separate email account to monitor for incoming orders, or to trigger third-party automations.
Phone Number
The phone number for the Dasher to call, including country code, if there are any issues with the pick up. The phone number must be a valid US phone number.
Pickup Instructions
If filled in, the contents of this field will be provided to Dashers picking up orders from this location.
Address
Fill in the address fields with the physical address of the pickup location. State and Country should use two-character abbreviations, e.g. PA and US.
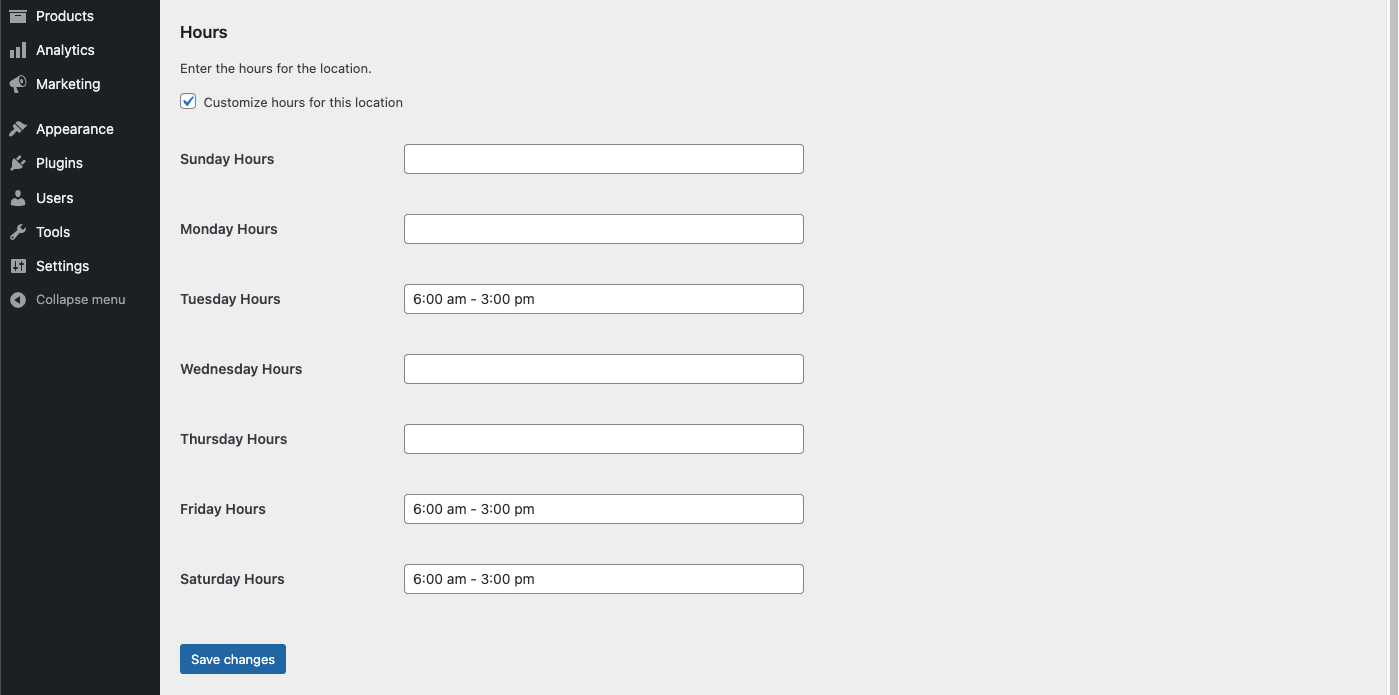
Custom hours section of the Location editor
Hours
Check the “Customize hours for this location” checkbox to display hours fields that can be customized for this location.
Enter hours for each day with a dash separating the opening and closing time, eg 10:00am - 8:00pm. Multiple ranges can also be entered separated with a comma, eg, 10:00am - 1:00pm, 4:00pm - 7:00pm. If deliveries are not offered, leave the field for that day blank.
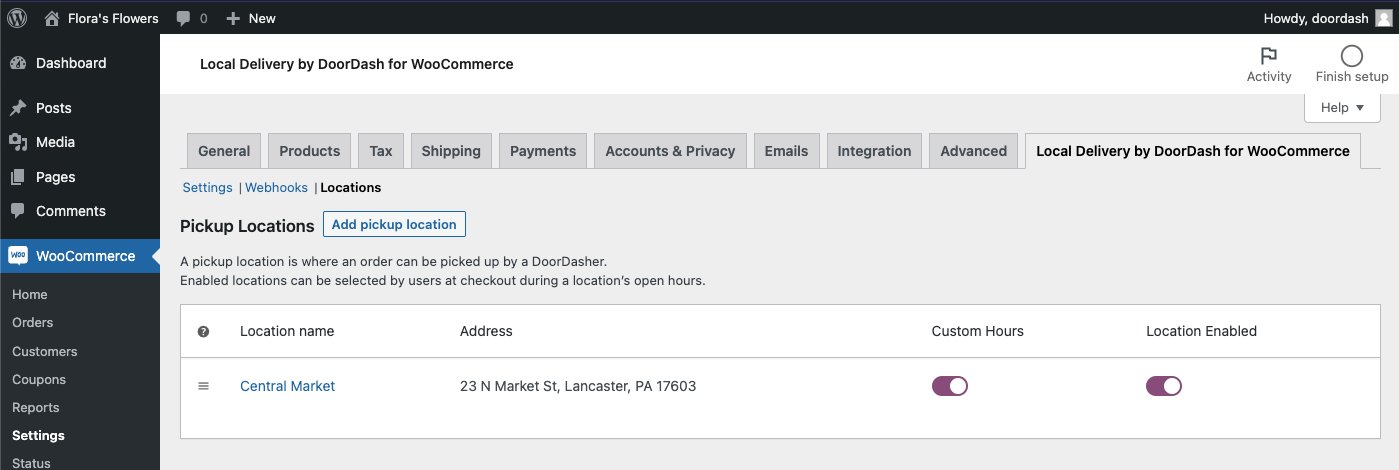
Location listing screen
Location List
After locations have been added, they will be listed on the Locations screen. Locations can be added, edited, or deleted from this screen. There are also toggles available for each location to allow for turning custom hours for that location on or off, or quickly enabling/disabling the location.
Adding a Shipping Method
Local Delivery by DoorDash works as a WooCommerce shipping method. To allow customers to select it as a shipping method, the method must be added to a Shipping zone.
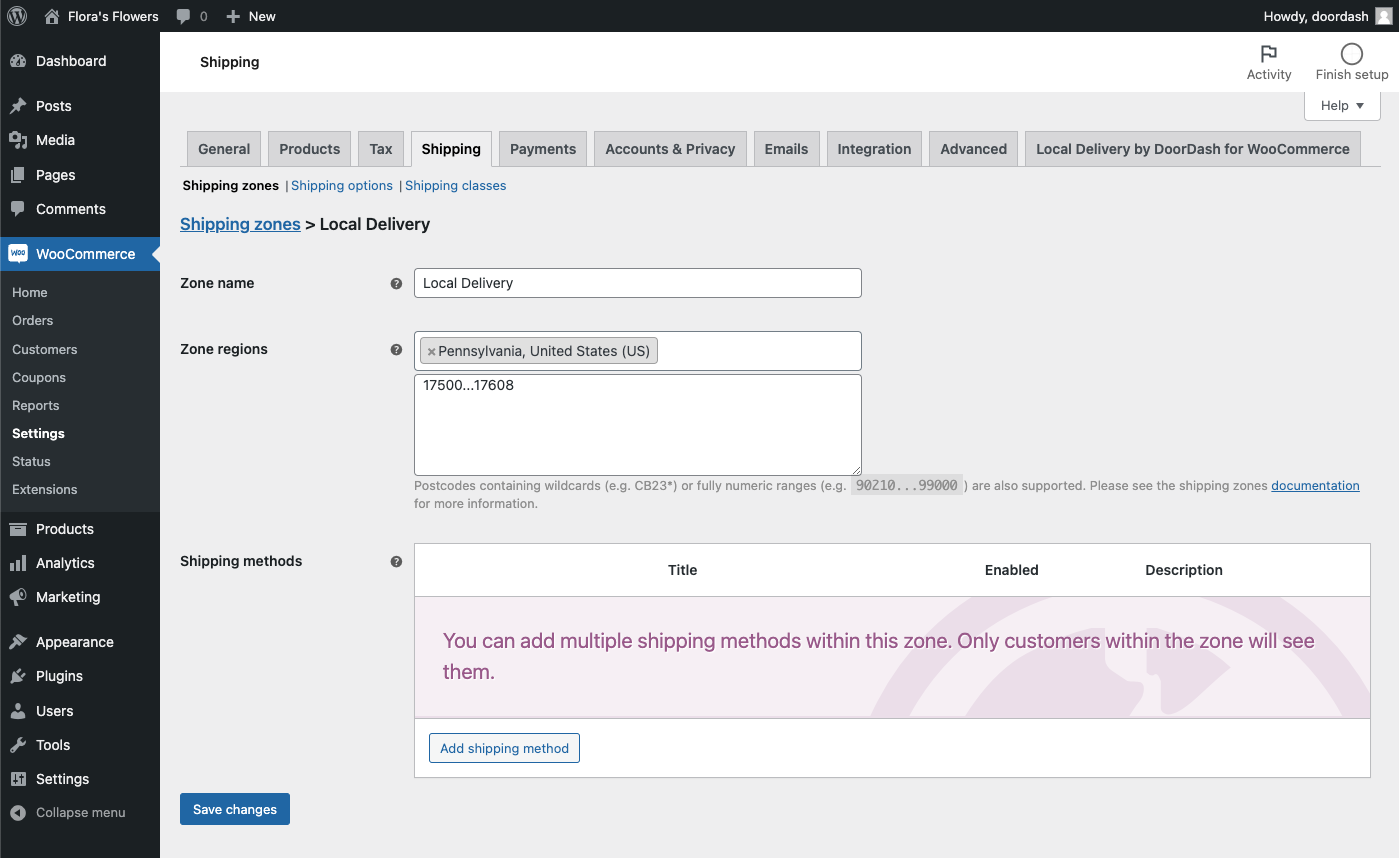
Visit WooCommerce > Settings > Shipping to access the Shipping zones screen.
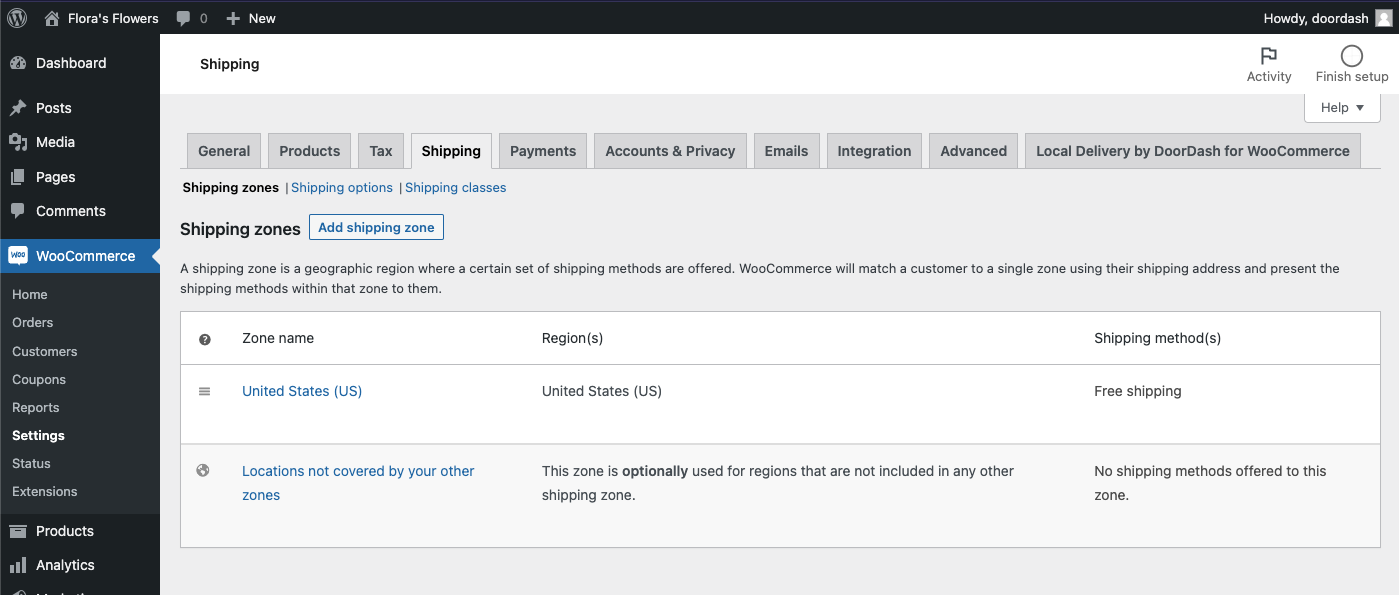
WooCommerce shipping zones screen
The screenshot above shows the default setup for a new WooCommerce store, with a single shipping zone for the United States. You can set up a shipping zone for a smaller geographical area to only show DoorDash delivery as an option near your pickup locations, or you can add DoorDash to an existing shipping zone. Your configuration may vary. Note: Shipping zones are matched in the order listed, so Local zones typically should be placed at the top.
Shipping zone screen
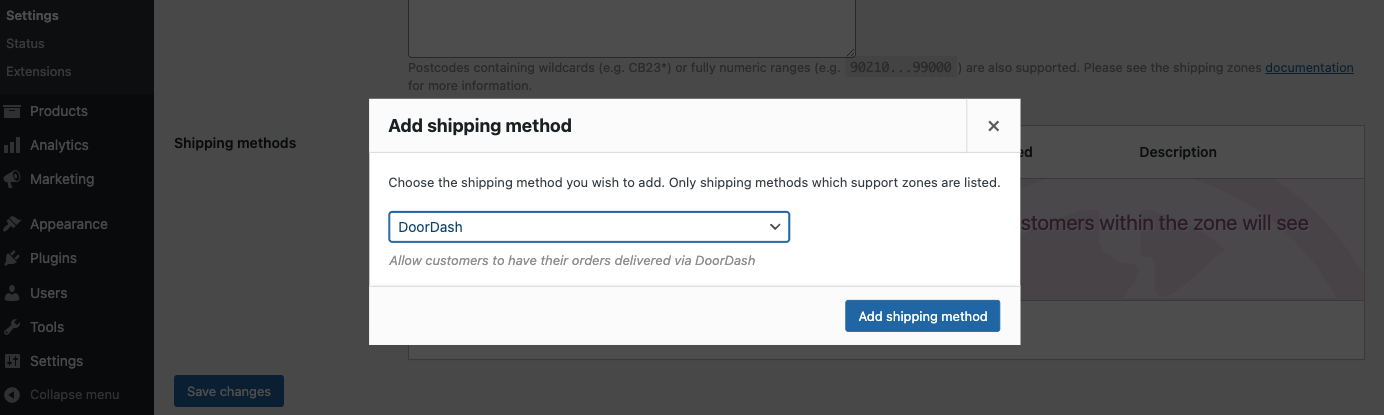
After creating or editing a shipping zone, click the Add shipping method button.
Add shipping method
Select “DoorDash” from the list and click Add shipping method.
Shipping method settings
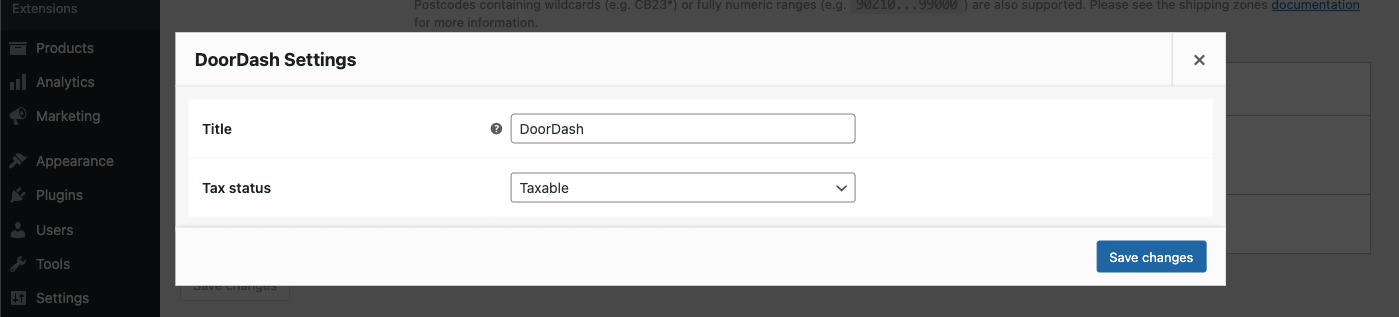
After creating the shipping method, you may configure the title displayed to the user and the tax status for the method. You may also enable or disable the DoorDash shipping method from the Shipping Zone screen.
Orders
When orders have been placed with DoorDash selected as the shipping method, an API call is sent to the DoorDash Drive API which kicks off the delivery process. An email is sent to the address configured in the selected pickup location, and data about the delivery is saved with the order.
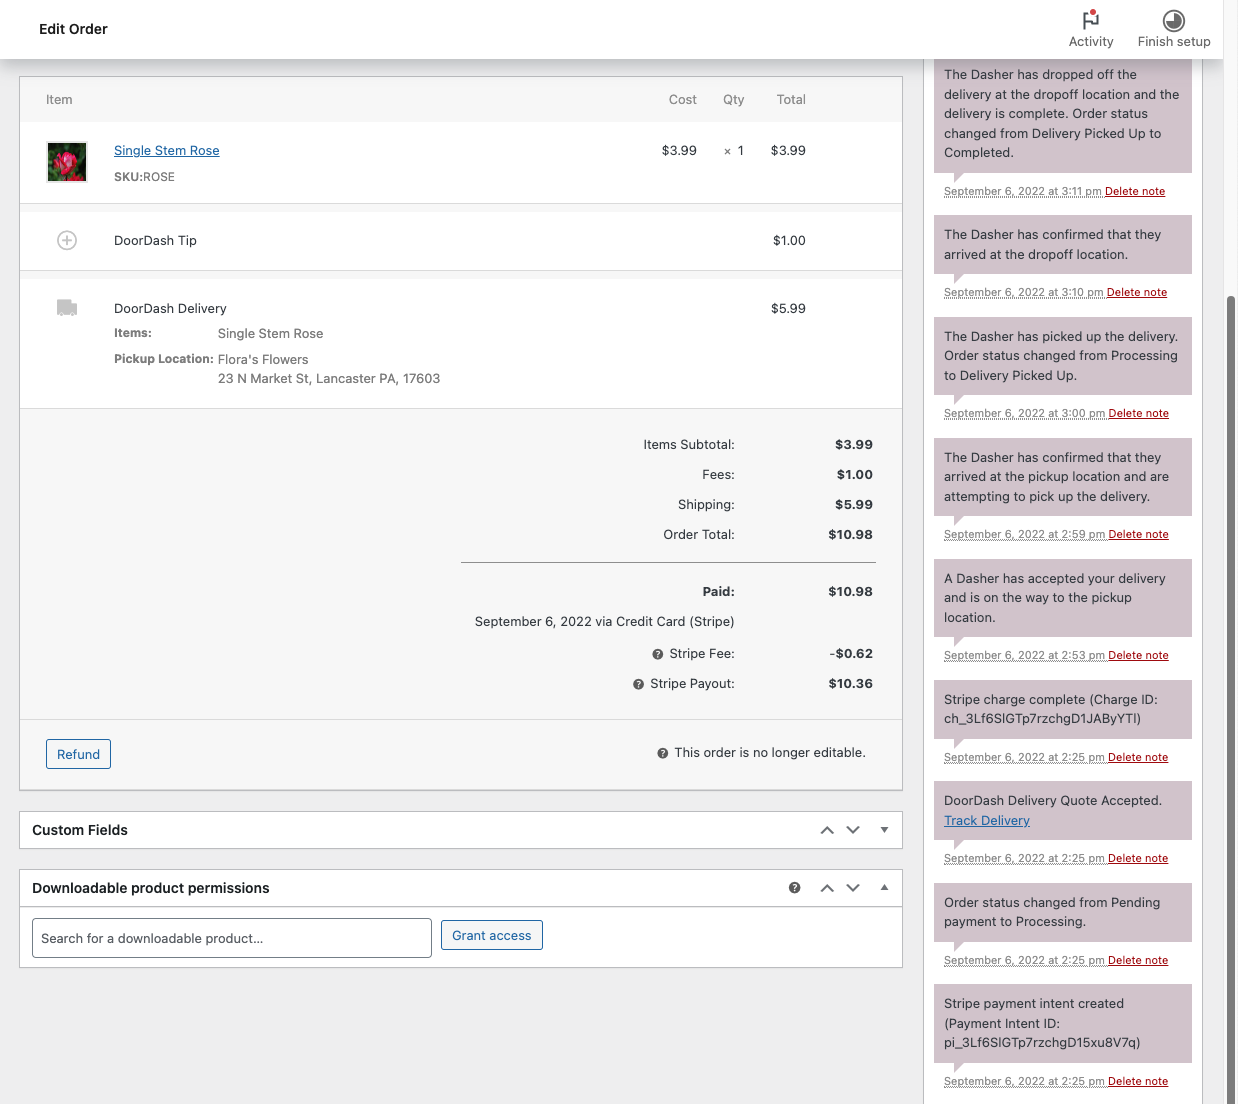
WooCommerce Order Edit screen
As you can see in the screenshot above of a completed order, the shipping method displays information about the pickup location, and the DoorDash tip is displayed with the order.
On the right in the Order Notes section, you can see the updates that have been attached to the order by the DoorDash webhooks. The first note with “DoorDash Delivery Quote Accepted. Track Delivery” contains a link to the tracking for this order. This note is created when the order is accepted and will be displayed even if the DoorDash webhooks are not properly configured.
When the delivery has been dropped off, the order is automatically marked as complete.
Create a delivery
Now you can create a delivery request using the Plugin in your WooCommerce store.
Use the Delivery Simulator
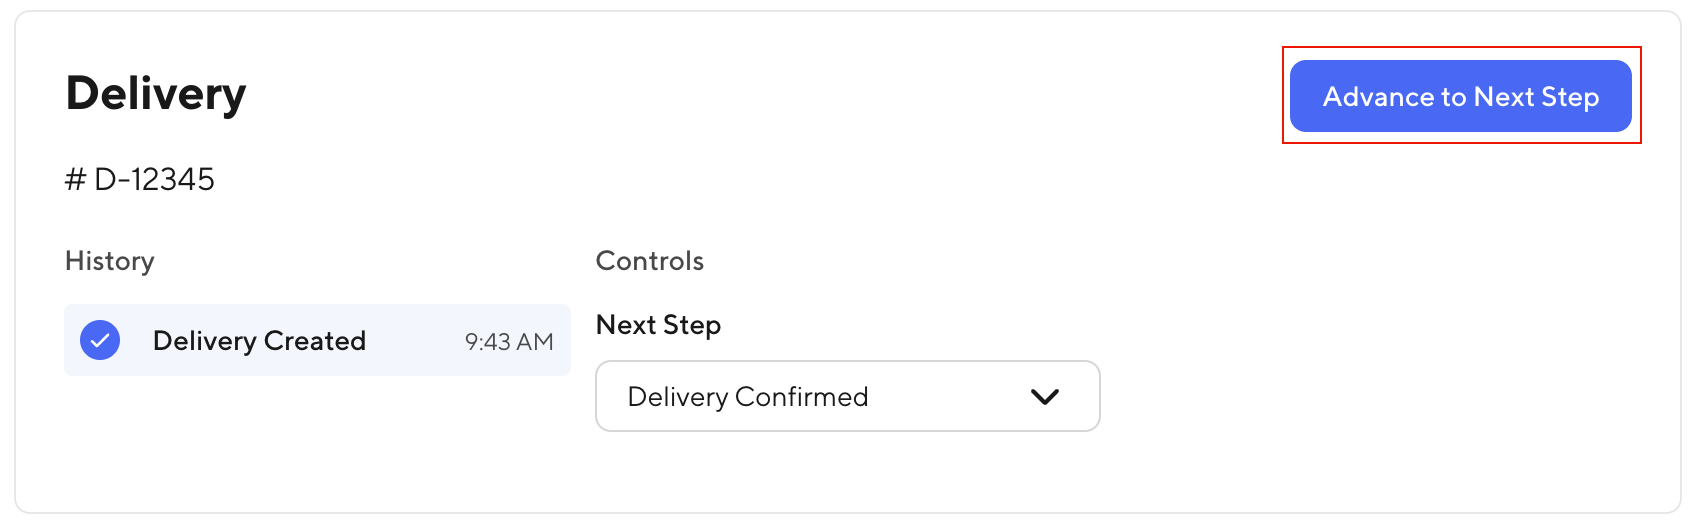
You can use the Delivery Simulator to advance your delivery through the stages of the delivery process, from creation to Dasher assignment to pickup to delivery.
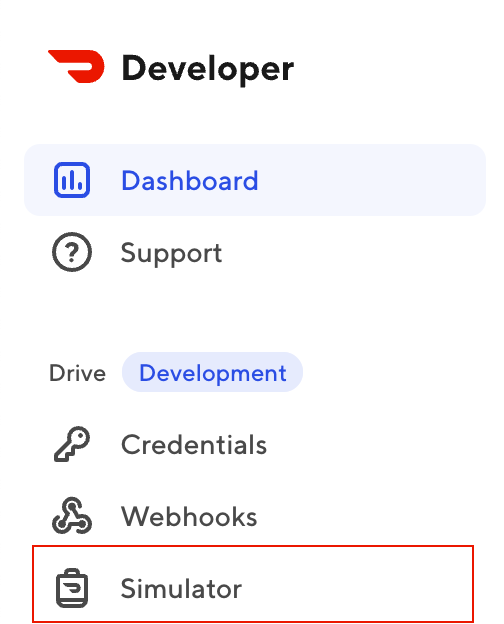
In the Developer Portal left navigation, click Simulator.
Find the delivery you created by looking for the identifier #D-12345. Click Advance to Next Step to move your delivery to the Delivery Confirmed stage.
Get the status of your delivery
You have three options to programmatically obtain the latest status of a delivery:
Finish up
You can use the Delivery Simulator to advance your delivery through the stages of the delivery process and then re-run the Get Delivery Status request to see how the delivery details change.
Next steps
Now that you're familiar with the Local Delivery by DoorDash plugin, you're ready to start adding delivery capabilities to your WooCommerce Store! Explore more detail about configuring shipping zones and delivery settings, and configuration options for developers and site administrators.