Get started (API)
Production access to the Drive API is currently restricted, and we cannot provide a timeline for certification following development. If you have not completed development and submitted a production access request, we recommend pausing development. Contact us here to record your interest.
This tutorial will introduce you to the Drive API, DoorDash's API for requesting deliveries fulfilled by our fleet of Dashers. It assumes you're comfortable with the basics of calling web APIs, working with JSON, and writing code in a programming language of your choice.
If you're using Node.js, you should use the Get started (Node.js SDK) tutorial instead.
Table of contents
- Sign into the Developer Portal
- Create an access key
- Install pre-requisites and create a project
- Make a JWT
- Create a delivery
- Use the Delivery Simulator
- Get the status of your delivery
- Finish up
Sign into the Developer Portal
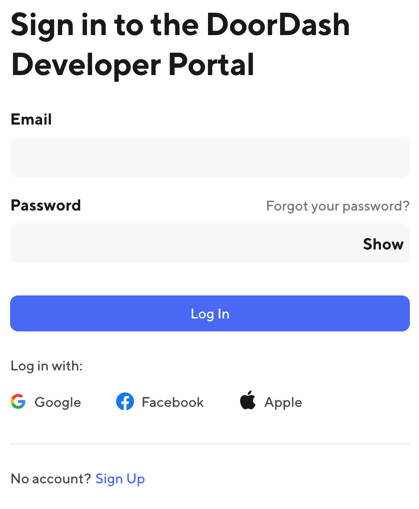
Go to the
Developer Portal
using the link in the top right corner of this page. If you already have a DoorDash account, enter your email and password and sign in; if not, or if you want to use a different account for development, click Sign Up and follow the process to create an account.
Create an access key
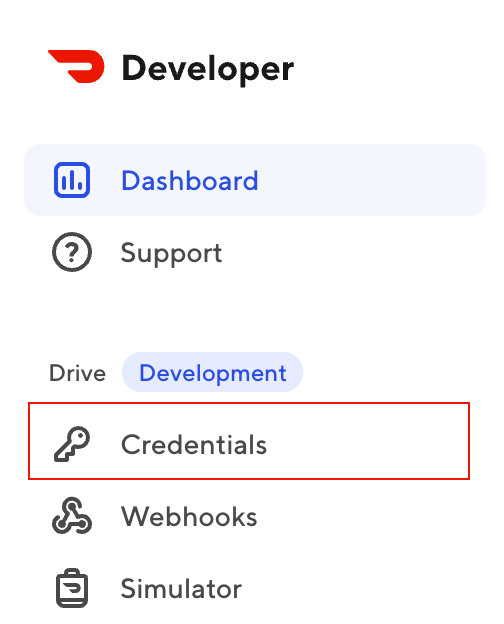
In the left navigation, click Credentials.
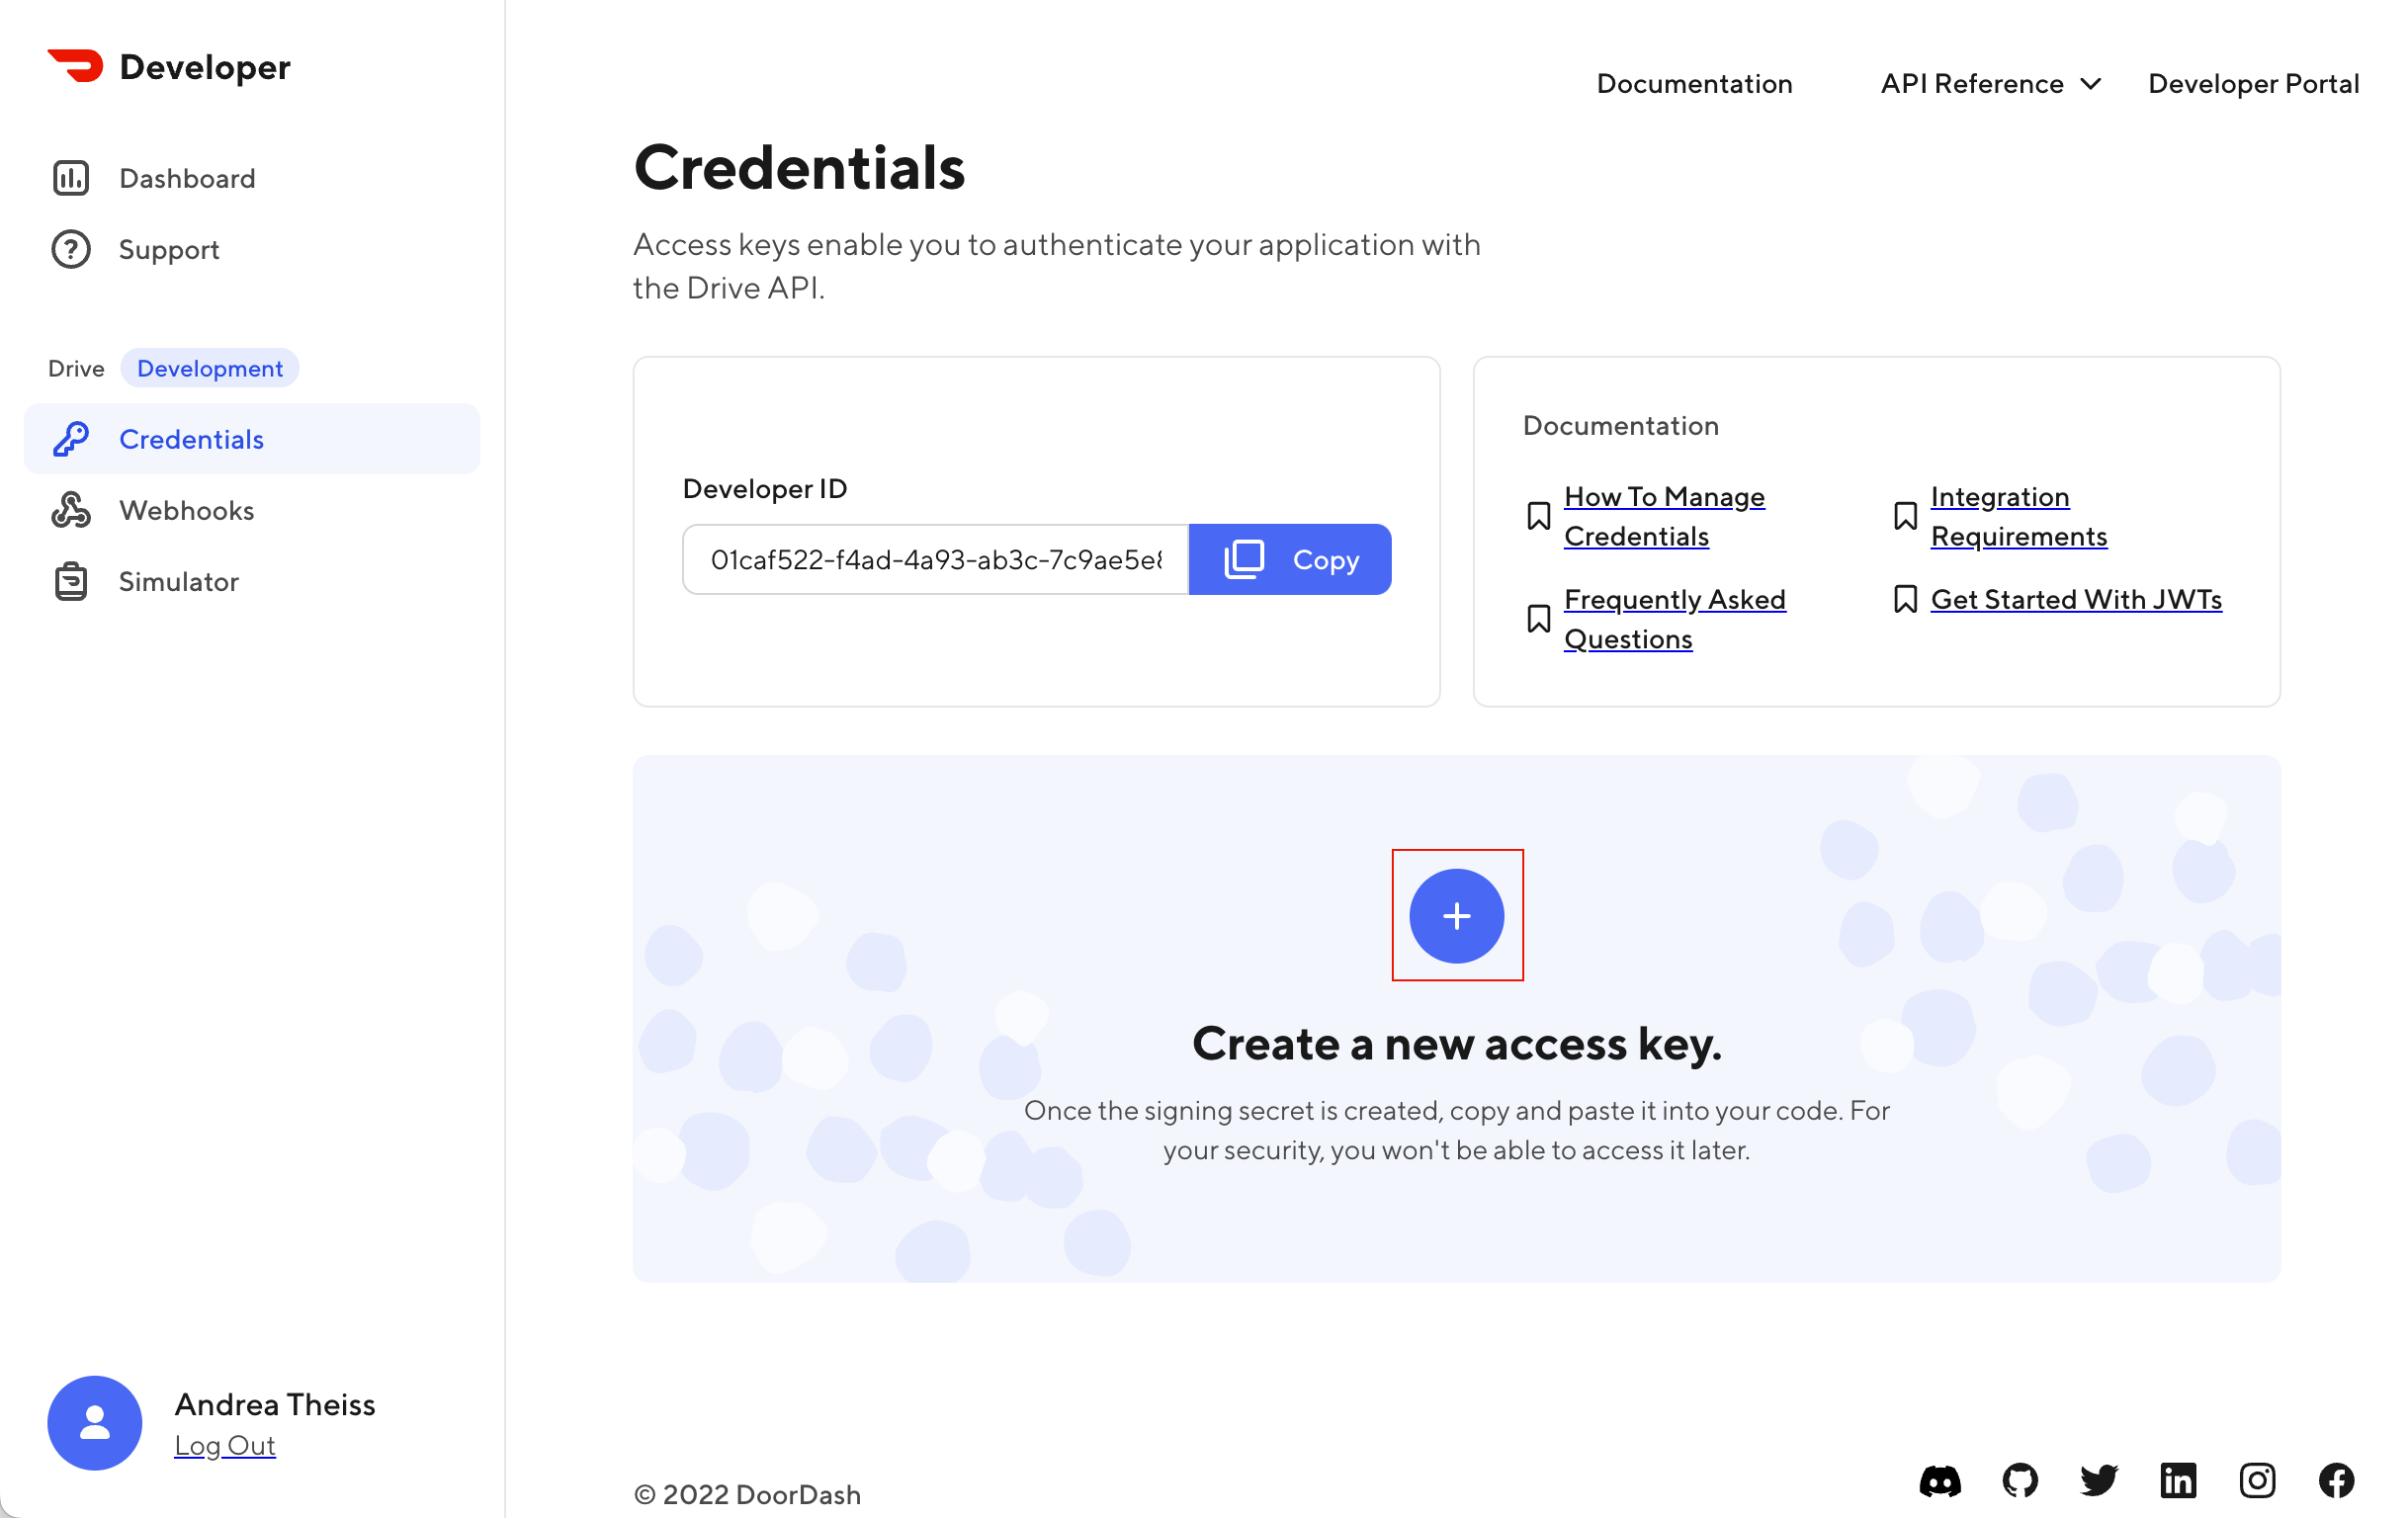
On the Credentials page, click the plus (+) icon in the center of the page to create a new access key. You'll use this access key to create a JSON Web Token (JWT) that you can use to make requests to the Drive API.
Name your key test-app and click Create Access Key.

Click Copy to copy the access key to your clipboard and then paste it somewhere where you can access it later in the tutorial.

Install pre-requisites and create a project
- Node.js
- Python
- PHP
- Kotlin
- C#
If you don't already have them, install Node.js and npm.
Then, create a directory for your project called test-app and then create a new file named app.js.
If you don't already have it, install Python.
Then, create a directory for your project called test-app and then create a new file named app.py.
If you don't already have it, install PHP.
Then, create a directory called test-app and then create a new file named doordash.php.
If you don't already have them, install Kotlin, a JDK (such as Amazon Corretto 17), and a build automation tool (such as Gradle).
Then, create a new project in your IDE (such as IntelliJ IDEA) and modify the Main.kt file with sample code below.
If you don't already have it, install .NET.
Create a directory for your project called test-app and then run dotnet new console. Alternatively, you can create, build, and run your sample application in variety of IDEs, including Visual Studio Code, Visual Studio, and JetBrains Rider.
Make a JWT
Prerequisites
Before getting started, ensure you have created and saved an access key from the Developer Portal.
To continue, you will need: developer_id, key_id and signing_secret
Install a JWT library
Most programming languages provide support for creating JSON Web Tokens (JWTs) either directly in the language or as a package. Select your language and then follow the instructions to install the package, if needed.
- Node.js
- Python
- PHP
- Java
- Kotlin
- C#
Open a terminal and navigate to your project directory, then run:
npm install jsonwebtoken
Open a terminal and navigate to your project directory, then run:
pip3 install pyjwt
PHP supports JWTs without any additional packages; head to the next step!
Copy this snippet into your build.gradle file:
dependencies {
    implementation("io.jsonwebtoken:jjwt-api:0.11.1")
    implementation("io.jsonwebtoken:jjwt-impl:0.11.1")
    implementation("io.jsonwebtoken:jjwt-jackson:0.11.1")
}
Copy this snippet into your build.gradle.kts file:
dependencies {
    implementation("io.jsonwebtoken:jjwt-api:0.11.5")
    implementation("io.jsonwebtoken:jjwt-impl:0.11.5")
    implementation("io.jsonwebtoken:jjwt-jackson:0.11.5")
}
To use these dependencies, you'll need to target at least version 11 of a JDK. For example, if targeting Amazon Corretto 17 then update build.gradle.kts file section to:
kotlin {
    jvmToolchain(17)
}
Open a terminal and navigate to your project directory, then run:
dotnet add package System.IdentityModel.Tokens.Jwt
Generate a JWT
JWTs are created using an access key. Use these code snippets to generate a correctly-formatted JWT from your access key.
- Node.js
- Python
- PHP
- Java
- Kotlin
- C#
Copy the code snippet below into your project file. Replace PASTE_YOUR_ACCESS_KEY_HERE with your access key.
const jwt = require('jsonwebtoken')

const accessKey = PASTE_YOUR_ACCESS_KEY_HERE

const data = {
  aud: 'doordash',
  iss: accessKey.developer_id,
  kid: accessKey.key_id,
  exp: Math.floor(Date.now() / 1000 + 300),
  iat: Math.floor(Date.now() / 1000),
}

const headers = { algorithm: 'HS256', header: { 'dd-ver': 'DD-JWT-V1' } }

const token = jwt.sign(
  data,
  Buffer.from(accessKey.signing_secret, 'base64'),
  headers,
)

console.log(token)
Then, test your code. In your terminal, run:
node app.js
If you were successful, you should see output like this:

Copy the code snippet below into your project file. Replace PASTE_YOUR_ACCESS_KEY_HERE with your access key.
from os import access
import jwt.utils
import time
import math

accessKey = PASTE_YOUR_ACCESS_KEY_HERE

token = jwt.encode(
    {
        "aud": "doordash",
        "iss": accessKey["developer_id"],
        "kid": accessKey["key_id"],
        "exp": str(math.floor(time.time() + 300)),
        "iat": str(math.floor(time.time())),
    },
    jwt.utils.base64url_decode(accessKey["signing_secret"]),
    algorithm="HS256",
    headers={"dd-ver": "DD-JWT-V1"})

print(token)
Then, test your code. In your terminal, run:
python3 app.py
If you were successful, you should see output like this:

function base64UrlEncode(string $data): string
{
    $base64Url = strtr(base64_encode($data), '+/', '-_');

    return rtrim($base64Url, '=');
}

function base64UrlDecode(string $base64Url): string
{
    return base64_decode(strtr($base64Url, '-_', '+/'));
}

$header = json_encode([
    'alg' => 'HS256',
    'typ' => 'JWT',
    'dd-ver' => 'DD-JWT-V1'
]);

$payload = json_encode([
    'aud' => 'doordash',
    'iss' => '{developer_id}',
    'kid' => '{key_id}',
    'exp' => time() + 300,
    'iat' => time()
]);

$base64UrlHeader = base64UrlEncode($header);
$base64UrlPayload = base64UrlEncode($payload);

$signature = hash_hmac('sha256', $base64UrlHeader . "." . $base64UrlPayload, base64UrlDecode({signing_secret}), true);
$base64UrlSignature = base64UrlEncode($signature);

$jwt = $base64UrlHeader . "." . $base64UrlPayload . "." . $base64UrlSignature;
import io.jsonwebtoken.Jwts;
import io.jsonwebtoken.io.Decoders;
import io.jsonwebtoken.security.Keys;
import java.security.Key;
import java.time.ZoneOffset;
import java.time.ZonedDateTime;
import java.util.HashMap;

public class main {
    public static void main(String[] args) {
        Map<String, Object> claims = new HashMap<>();

        // Replace the three constants below with the credentials generated from the DoorDash Developer portal
        claims.put("iss", "{developer_id}");
        claims.put("kid", "{key_id}");
        byte[] keyBytes = Decoders.BASE64URL.decode("{signing_secret}");

        claims.put("aud", "doordash");

        // Set token expiry to be one minute
        claims.put("exp", ZonedDateTime.now(ZoneOffset.UTC).plusMinutes(5).toEpochSecond());
        claims.put("iat", ZonedDateTime.now(ZoneOffset.UTC).toEpochSecond());

        Key key = Keys.hmacShaKeyFor(keyBytes);

        String jwt = Jwts.builder()
                .setHeaderParam("dd-ver", "DD-JWT-V1")
                .setHeaderParam("typ", "JWT")
                .setClaims(claims)
                .signWith(key)
                .compact();

        System.out.println(jwt);
    }
}
import io.jsonwebtoken.Jwts
import io.jsonwebtoken.io.Decoders
import io.jsonwebtoken.security.Keys
import java.security.Key
import java.time.ZoneOffset
import java.time.ZonedDateTime
import kotlin.collections.HashMap

val claims = HashMap<String, Any?>();

claims["aud"] = "doordash";
claims["iss"] = "{developer_id}";
claims["kid"] = "{key_id}";
claims["exp"] = ZonedDateTime.now(ZoneOffset.UTC).plusMinutes(5).toEpochSecond()
claims["iat"] = ZonedDateTime.now(ZoneOffset.UTC).toEpochSecond();

val keyBytes = Decoders.BASE64URL.decode("{signing_secret}")
val key: Key = Keys.hmacShaKeyFor(keyBytes)

val jwt: String = Jwts.builder()
    .setHeaderParam("dd-ver", "DD-JWT-V1")
    .setHeaderParam("typ", "JWT")
    .setClaims(claims)
    .signWith(key)
    .compact();
Copy the code snippet below into your project file. In the accessKey dictionary, replace the placeholder values with values from your access key.
using Microsoft.IdentityModel.Tokens;
using System.IdentityModel.Tokens.Jwt;
using System.Security.Claims;

var accessKey = new Dictionary<string, string>{
  {"developer_id", "PLACEHOLDER"},
  {"key_id", "PLACEHOLDER"},
  {"signing_secret", "PLACEHOLDER"}
};

var decodedSecret = Base64UrlEncoder.DecodeBytes(accessKey["signing_secret"]);
var securityKey = new SymmetricSecurityKey(decodedSecret);
var credentials = new SigningCredentials(securityKey, SecurityAlgorithms.HmacSha256);
var header = new JwtHeader(credentials);
header["dd-ver"] = "DD-JWT-V1";

var payload = new JwtPayload(
    issuer: accessKey["developer_id"],
    audience: "doordash",
    claims: new List<Claim> { new Claim("kid", accessKey["key_id"]) },
    notBefore: null,
    expires: System.DateTime.UtcNow.AddSeconds(300),
    issuedAt: System.DateTime.UtcNow);

var securityToken = new JwtSecurityToken(header, payload);
var token = new JwtSecurityTokenHandler().WriteToken(securityToken);

Console.WriteLine(token);
Then, test your code. In your terminal, run:
dotnet run
If you were successful, you should see output like this:

Create a delivery
Now that you have a JWT, you can create a delivery by making a request to the Drive API.
When you created your access key, you created it for the Sandbox environment (until you request production access, you can only create access keys for the Sandbox environment). Because you're using an access key for the Sandbox environment, you can experiment with the API as much as you like without incurring real costs or hailing real Dashers.
- Node.js
- Python
- PHP
- Kotlin
- C#
First, install the axios npm package.
npm install axios
Then, copy the snippet below into app.js, at the end of the file.
const axios = require('axios')

const body = JSON.stringify({
  external_delivery_id: 'D-12345',
  pickup_address: '901 Market Street 6th Floor San Francisco, CA 94103',
  pickup_business_name: 'Wells Fargo SF Downtown',
  pickup_phone_number: '+16505555555',
  pickup_instructions: 'Enter gate code 1234 on the callbox.',
  dropoff_address: '901 Market Street 6th Floor San Francisco, CA 94103',
  dropoff_business_name: 'Wells Fargo SF Downtown',
  dropoff_phone_number: '+16505555555',
  dropoff_instructions: 'Enter gate code 1234 on the callbox.',
  order_value: 1999,
})

axios
  .post('https://openapi.doordash.com/drive/v2/deliveries', body, {
    headers: {
      Authorization: 'Bearer ' + token,
      'Content-Type': 'application/json',
    },
  })
  .then(function (response) {
    console.log(response.data)
  })
  .catch(function (error) {
    console.log(error)
  })
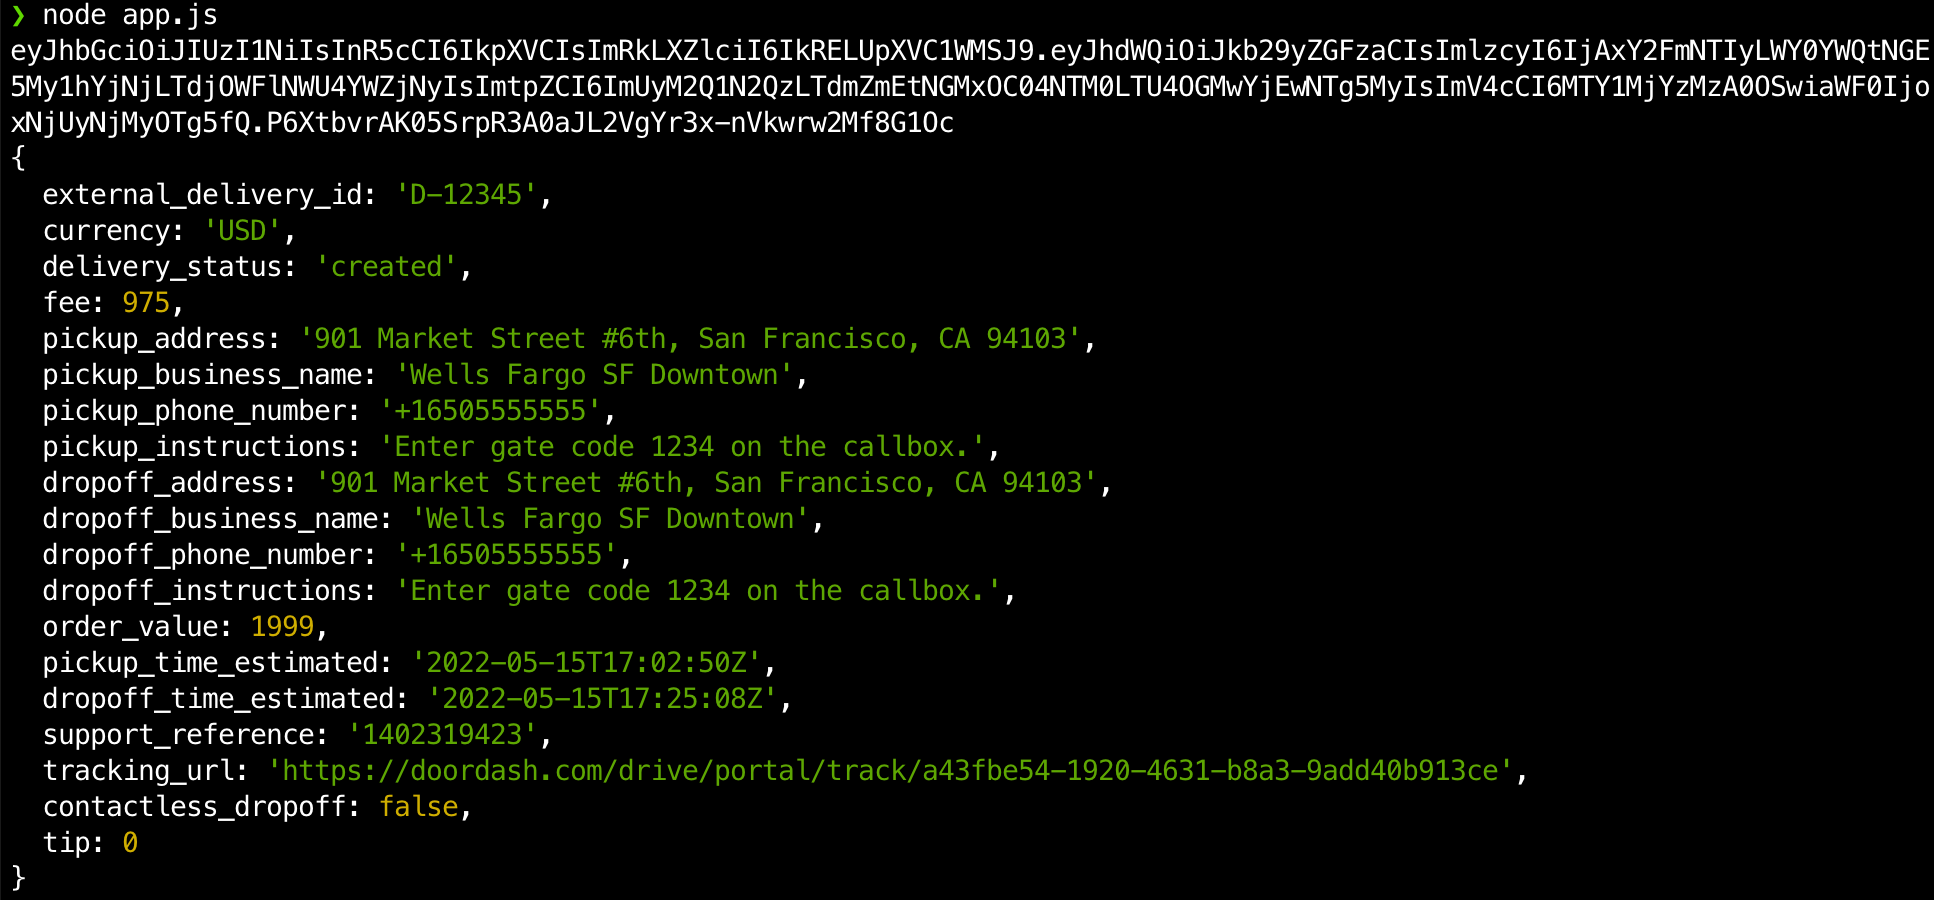
Test your code. In your terminal, run:
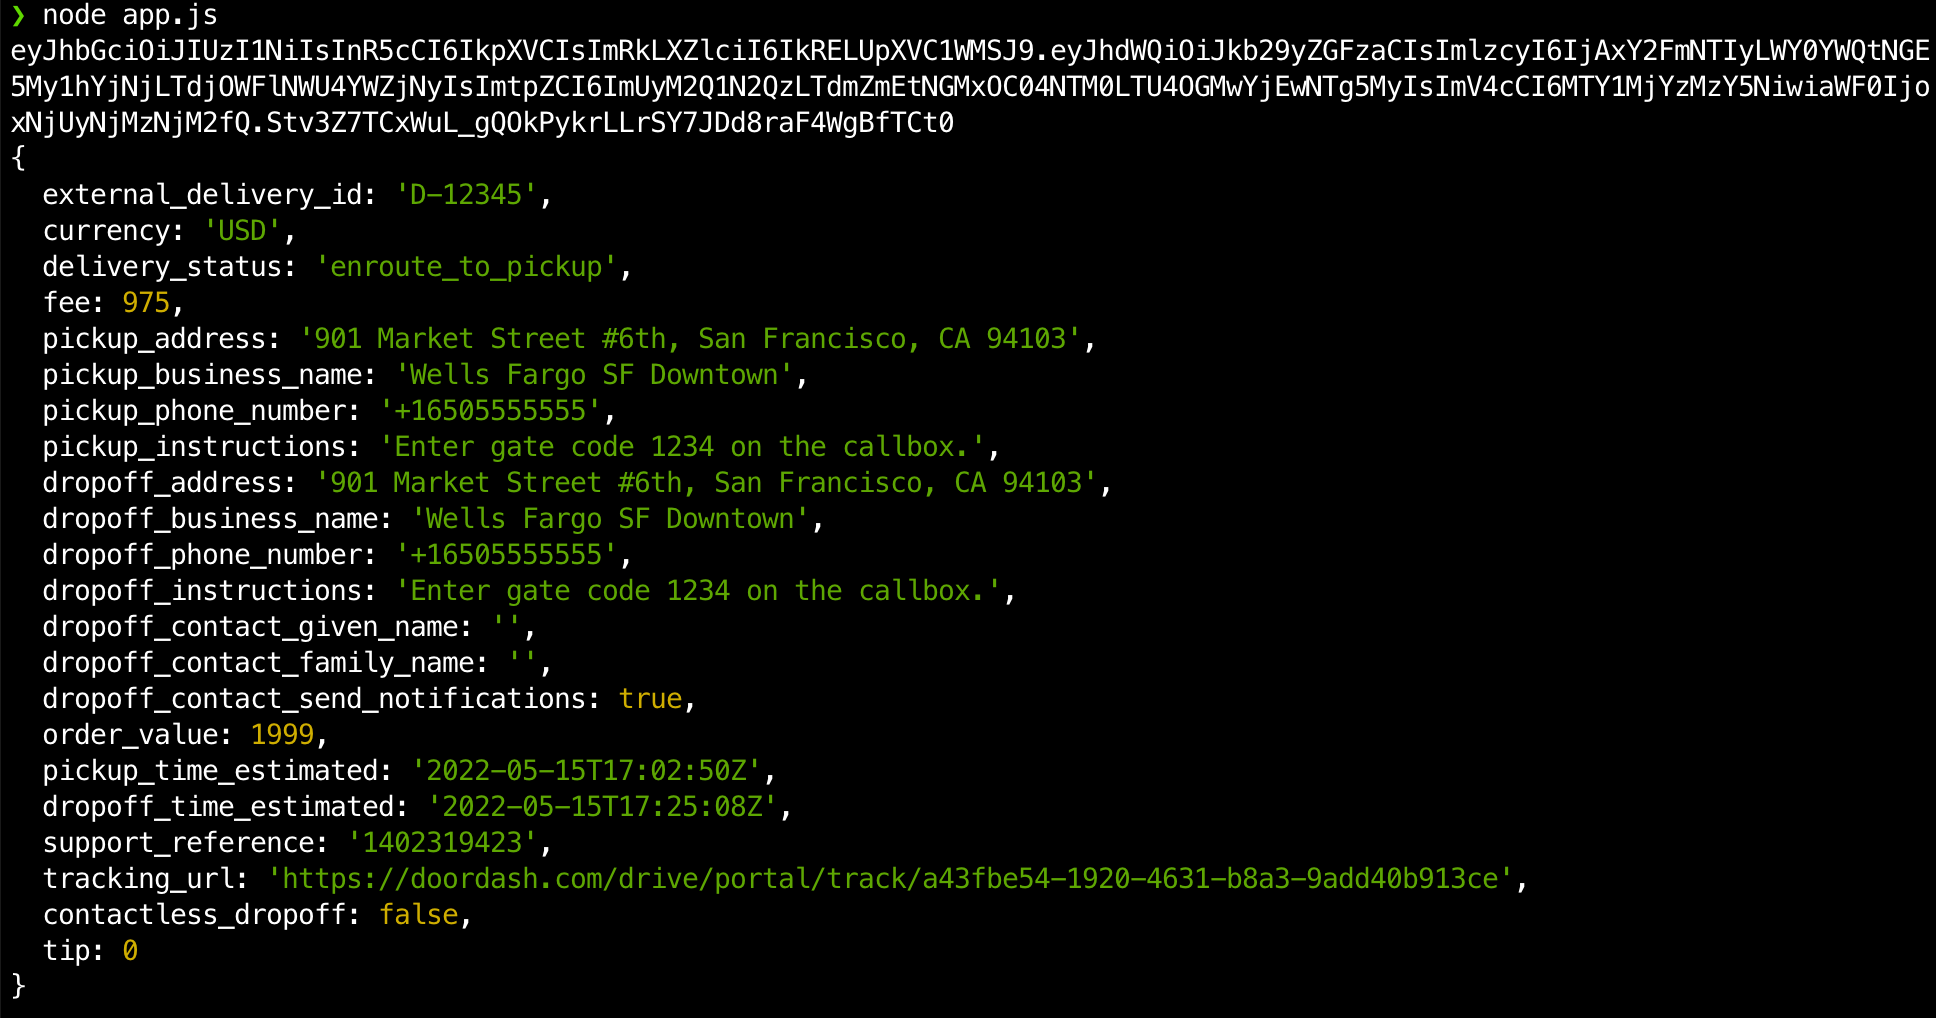
node app.js
If you were successful, you should see output like this:
First, install the requests pip package.
pip3 install requests
Then, copy the snippet below into app.py, at the end of the file.
import requests

endpoint = "https://openapi.doordash.com/drive/v2/deliveries/"

headers = {"Accept-Encoding": "application/json",
           "Authorization": "Bearer " + token,
           "Content-Type": "application/json"}

request_body = { # Modify pickup and drop off addresses below
    "external_delivery_id": "D-12345",
    "pickup_address": "901 Market Street 6th Floor San Francisco, CA 94103",
    "pickup_business_name": "Wells Fargo SF Downtown",
    "pickup_phone_number": "+16505555555",
    "pickup_instructions": "Enter gate code 1234 on the callbox.",
    "dropoff_address": "901 Market Street 6th Floor San Francisco, CA 94103",
    "dropoff_business_name": "Wells Fargo SF Downtown",
    "dropoff_phone_number": "+16505555555",
    "dropoff_instructions": "Enter gate code 1234 on the callbox.",
    "order_value": 1999
}

create_delivery = requests.post(endpoint, headers=headers, json=request_body) # Create POST request


print(create_delivery.status_code)
print(create_delivery.text)
print(create_delivery.reason)
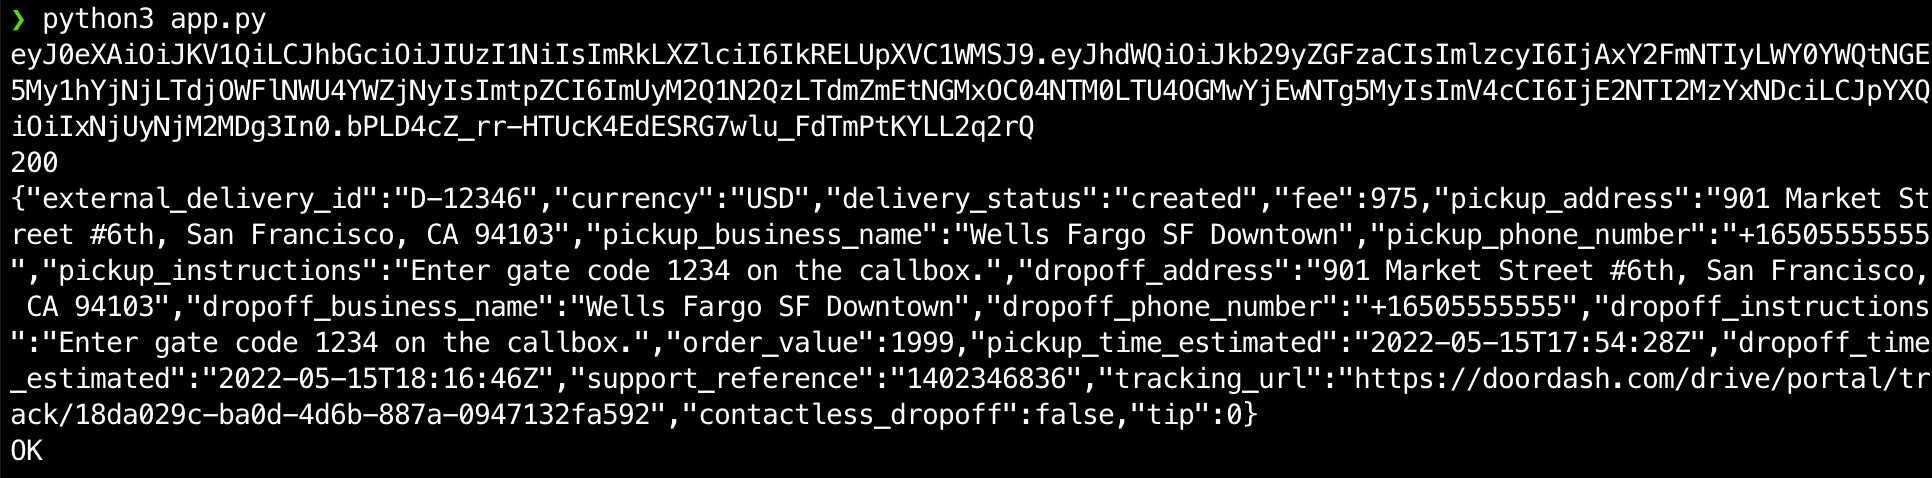
Test your code. In your terminal, run:
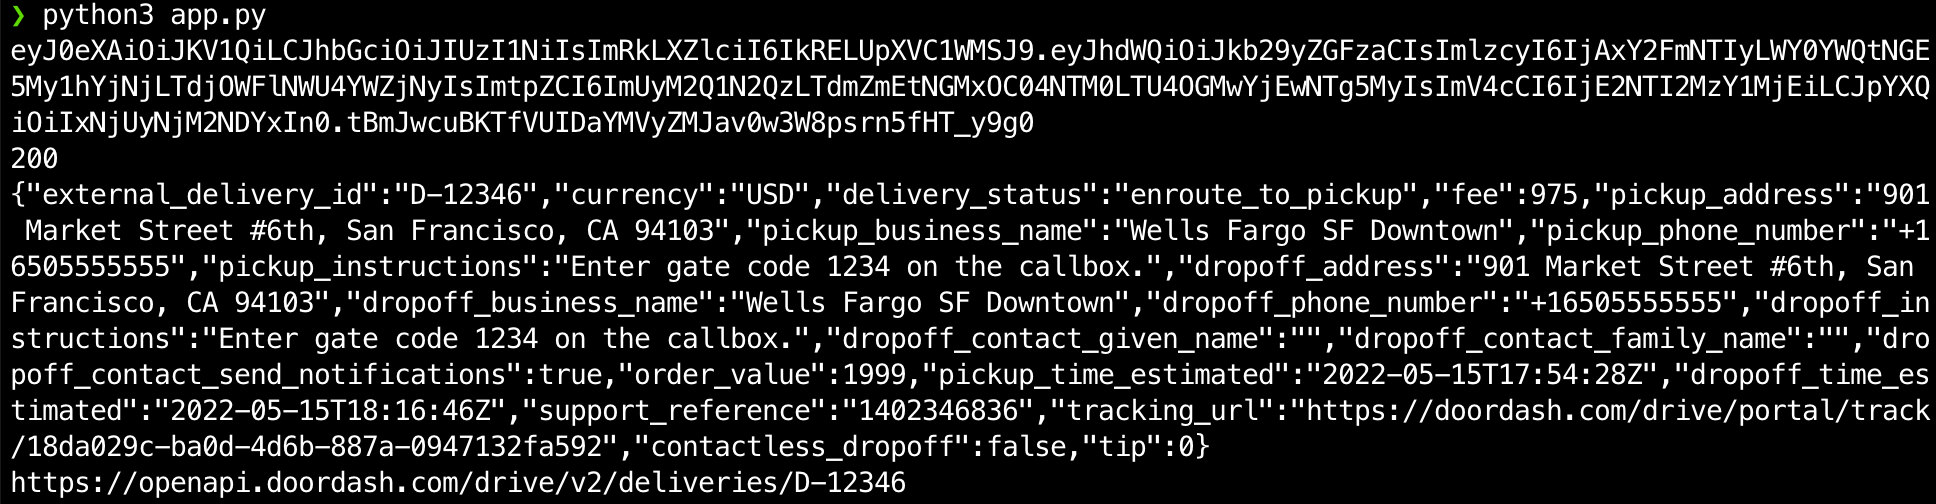
python3 app.py
If you were successful, you should see output like this:
$jwt = "Refer to How To > Get Started With JWTs"

// Modify pickup and drop off addresses below
$request_body = json_encode([
  "external_delivery_id" => "{Generate_your_own_id}",
  "pickup_address"=> "901 Market Street 6th Floor San Francisco, CA 94103",
  "pickup_business_name"=> "Wells Fargo SF Downtown",
  "pickup_phone_number"=> "+16505555555",
  "pickup_instructions"=> "Enter gate code 1234 on the callbox.",
  "dropoff_address"=> "901 Market Street 6th Floor San Francisco, CA 94103",
  "dropoff_business_name"=> "Wells Fargo SF Downtown",
  "dropoff_phone_number"=> "+16505555555",
  "dropoff_instructions"=> "Enter gate code 1234 on the callbox.",
  "order_value"=> 1999
]);

$headers = array(
  "Content-type: application/json",
  "Authorization: Bearer ".$jwt
);

$ch = curl_init();
curl_setopt($ch, CURLOPT_URL, "https://openapi.doordash.com/drive/v2/deliveries/");
curl_setopt($ch, CURLOPT_POST, 1);
curl_setopt($ch, CURLOPT_POSTFIELDS, $request_body);
curl_setopt($ch, CURLOPT_HTTPHEADER, $headers);
$result = curl_exec($ch);
echo($result)
import java.net.URI
import java.net.http.HttpClient
import java.net.http.HttpRequest
import java.net.http.HttpResponse
import java.util.*

val body = """{
    "external_delivery_id": "${UUID.randomUUID()}",
    "pickup_address": "901 Market Street 6th Floor San Francisco, CA 94103",
    "pickup_business_name": "Wells Fargo SF Downtown",
    "pickup_phone_number": "+16505555555",
    "pickup_instructions": "Enter gate code 1234 on the callbox.",
    "dropoff_address": "901 Market Street 6th Floor San Francisco, CA 94103",
    "dropoff_business_name": "Wells Fargo SF Downtown",
    "dropoff_phone_number": "+16505555555",
    "dropoff_instructions": "Enter gate code 1234 on the callbox.",
    "order_value": 1999
}"""

val client = HttpClient.newBuilder().build();
val request = HttpRequest.newBuilder()
    .uri(URI.create("https://openapi.doordash.com/drive/v2/deliveries/"))
    .header("Authorization", "Bearer $jwt")
    .header("Content-Type", "application/json")
    .POST(HttpRequest.BodyPublishers.ofString(body))
    .build();

val response = client.send(request, HttpResponse.BodyHandlers.ofString());
println(response.body())
Copy the snippet below into your project file, near the top with the other using statements:
using System.Text;
using System.Text.Json;
Then, copy the snippet below into your project file at the end:
var jsonContent = JsonSerializer.Serialize(new {
    external_delivery_id = "D-12345",
    pickup_address = "901 Market Street 6th Floor San Francisco, CA 94103",
    pickup_business_name = "Wells Fargo SF Downtown",
    pickup_phone_number = "+16505555555",
    pickup_instructions = "Enter gate code 1234 on the callbox.",
    pickup_reference_tag = "Order number 61",
    dropoff_address = "901 Market Street 6th Floor San Francisco, CA 94103",
    dropoff_business_name = "Wells Fargo SF Downtown",
    dropoff_phone_number = "+16505555555",
    dropoff_instructions = "Enter gate code 1234 on the callbox."
});
var content = new StringContent(jsonContent, Encoding.UTF8, "application/json");

HttpClient client = new HttpClient();
client.DefaultRequestHeaders.Authorization = new System.Net.Http.Headers.AuthenticationHeaderValue("Bearer", token);
var result = await client.PostAsync("https://openapi.doordash.com/drive/v2/deliveries", content);

var status = result.StatusCode;
var resultString = await result.Content.ReadAsStringAsync();
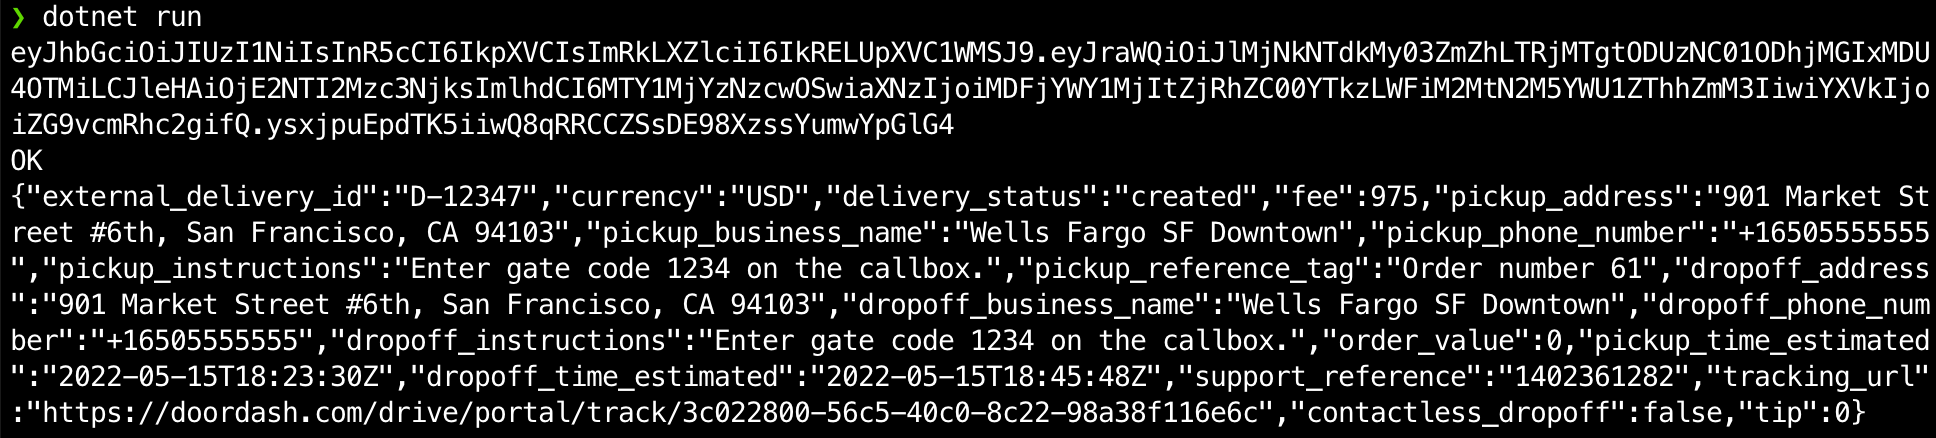
Test your code. In your terminal, run:
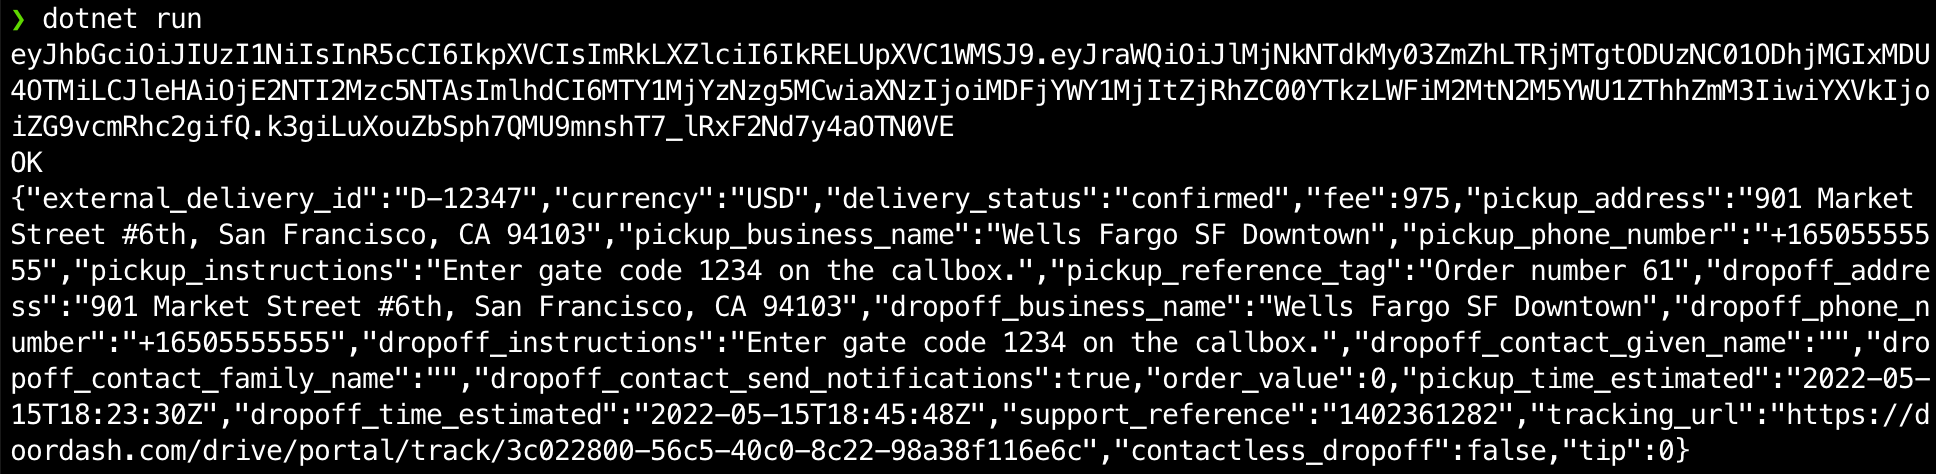
dotnet run
If you were successful, you should see output like this:
Use the Delivery Simulator
You can use the Delivery Simulator to advance your delivery through the stages of the delivery process, from creation to Dasher assignment to pickup to delivery.
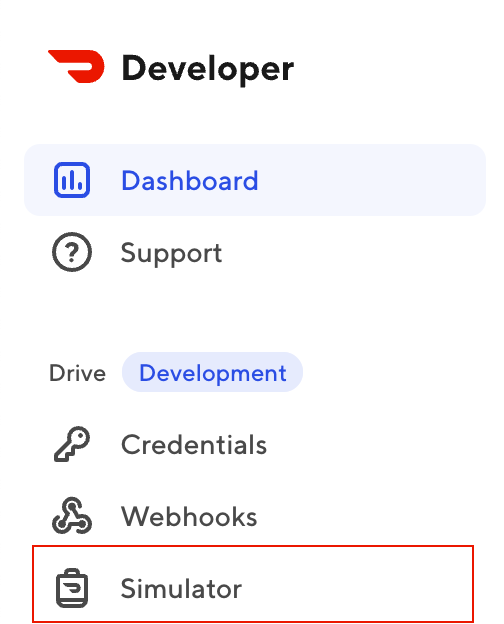
In the Developer Portal left navigation, click Simulator.
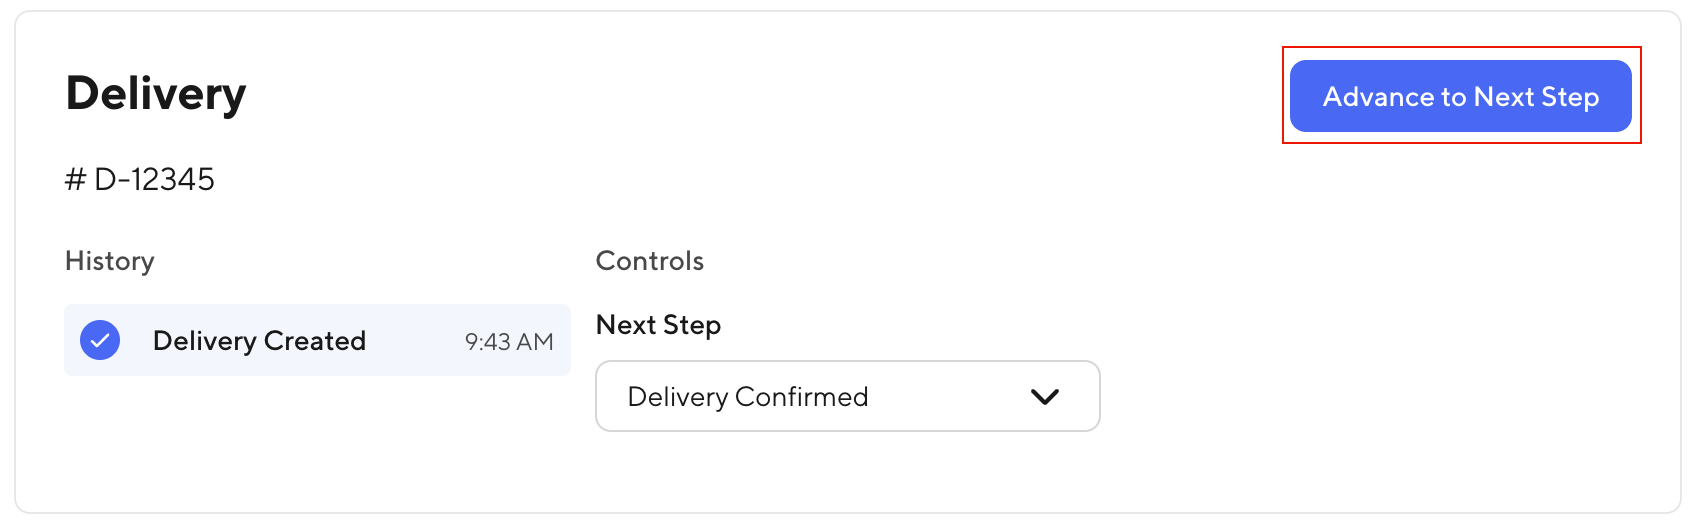
Find the delivery you created by looking for the identifier #D-12345. Click Advance to Next Step to move your delivery to the Delivery Confirmed stage.
Get the status of your delivery
You can always get the latest status of a delivery by making a request to the Drive API.
- Node.js
- Python
- PHP
- Kotlin
- C#
First, delete or comment out the request to create a delivery. If you don't, your code will try to create another delivery and run into a conflict.
// axios
//   .post('https://openapi.doordash.com/drive/v2/deliveries', body, {
//     headers: {
//       Authorization: 'Bearer ' + token,
//       'Content-Type': 'application/json',
//     },
//   })
//   .then(function (response) {
//     console.log(response.data)
//   })
//   .catch(function (error) {
//     console.log(error)
//   })
Copy the snippet below into app.js at the end of the file.
axios
  .get('https://openapi.doordash.com/drive/v2/deliveries/D-12345', {
    headers: {
      Authorization: 'Bearer ' + token,
      'Content-Type': 'application/json',
    },
  })
  .then(function (response) {
    console.log(response.data)
  })
  .catch(function (error) {
    console.log(error)
  })
Then, test your code. In your terminal, run:
node app.js
If you were successful, you should see output like this. Notice that the delivery_status is enroute_to_pickup.
First, delete or comment out the request to create a delivery. If you don't, your code will try to create another delivery and run into a conflict.
# create_delivery = requests.post(endpoint, headers=headers, json=request_body) # Create POST request

# print(create_delivery.status_code)
# print(create_delivery.text)
# print(create_delivery.reason)
Copy the snippet below into app.py at the end of the file.
get_delivery = requests.get(endpoint + 'D-12345', headers=headers) # Create GET request

print(get_delivery.status_code)
print(get_delivery.text)
print(get_delivery.url)
Then, test your code. In your terminal, run:
python3 app.py
If you were successful, you should see output like this. Notice that the delivery_status is enroute_to_pickup.
$jwt = "Refer to How To > Get Started With JWTs"

$headers = array(
  "Content-type: application/json",
  "Authorization: Bearer ".$jwt
);

$ch = curl_init();
curl_setopt($ch, CURLOPT_URL, "https://openapi.doordash.com/drive/v2/deliveries/{external_id_used_in_creation}");
curl_setopt($ch, CURLOPT_HTTPHEADER, $headers);
$result = curl_exec($ch);
echo($result)
import java.net.URI
import java.net.http.HttpClient
import java.net.http.HttpRequest
import java.net.http.HttpResponse
import java.util.*

val client = HttpClient.newBuilder().build();
val request = HttpRequest.newBuilder()
    .uri(URI.create("https://openapi.doordash.com/drive/v2/deliveries/{external_delivery_id}"))
    .header("Authorization", "Bearer $jwt")
    .build();

val response = client.send(request, HttpResponse.BodyHandlers.ofString());
println(response.body())
First, delete or comment out the request to create a delivery. If you don't, your code will try to create another delivery and run into a conflict.
// var result = await client.PostAsync("https://openapi.doordash.com/drive/v2/deliveries", content);

// var status = result.StatusCode;
// var resultString = await result.Content.ReadAsStringAsync();

// Console.WriteLine(status);
// Console.WriteLine(resultString);
Copy the snippet below into your project file at the end.
var result = await client.GetAsync($"https://openapi.doordash.com/drive/v2/deliveries/D-12345");

var status = result.StatusCode;
var resultString = await result.Content.ReadAsStringAsync();

Console.WriteLine(status);
Console.WriteLine(resultString);
Then, test your code. In your terminal, run:
dotnet run
If you were successful, you should see output like this. Notice that the delivery_status is enroute_to_pickup.
Finish up
If you'd like, continue to use the Delivery Simulator to advance your delivery through the stages of the delivery process and then re-run your app to see how the delivery details change.
The code in this tutorial was designed to help you quickly get started with the Drive API. It does not follow security best practices. If you take the code you wrote in this tutorial and bring it into your app:
- Don't check the access key into a source control system like Git, and instead use a secret manager or secret store to securely store it
- Do remove the line that prints your JWT to the console
Sample applications on GitHub
You can download and clone sample applications that communicate with the DoorDash API from GitHub.
- Node.js
- Python
- PHP
- Java
- Kotlin
- C#
View the DoorDash API Node.js Sample on GitHub.
View the DoorDash API Python Sample on GitHub.
View the DoorDash API PHP Sample on GitHub.
View the DoorDash API Java Sample on GitHub.
View the DoorDash API Kotlin Sample on GitHub.
View the DoorDash API C# / .NET Sample on GitHub.
Next steps
Now that you're familiar with the Drive API, you're ready to start adding delivery capabilities to your app! To learn more, use the "How-to guides" section in the navigation on the left side of this page and the How to Build for Restaurants guide.